
Bahamian Moor, Tandem Anchors & Snubbers in Crowds
Reversing current in a tight anchorage is where good boats start behaving badly. The Bahamian moor is a clean answer when the current flips close to 180° and the fleet is packed in like shopping carts. But it’s also one of the easiest “clever” rigs to get wrong, especially when wind builds, swell rolls in, or the load ends up on the windlass instead of a proper strong point.
This article is the practical version: what problems each setup solves, how to rig it so it survives a few tide cycles, and how to keep your neighbors from learning new swear words. Along the way, we’ll lean on the real-world intent behind ABYC H-40, ABYC H-41, and ISO 15084: strong points carry loads, windlasses do not, and chafe is always planning to win.

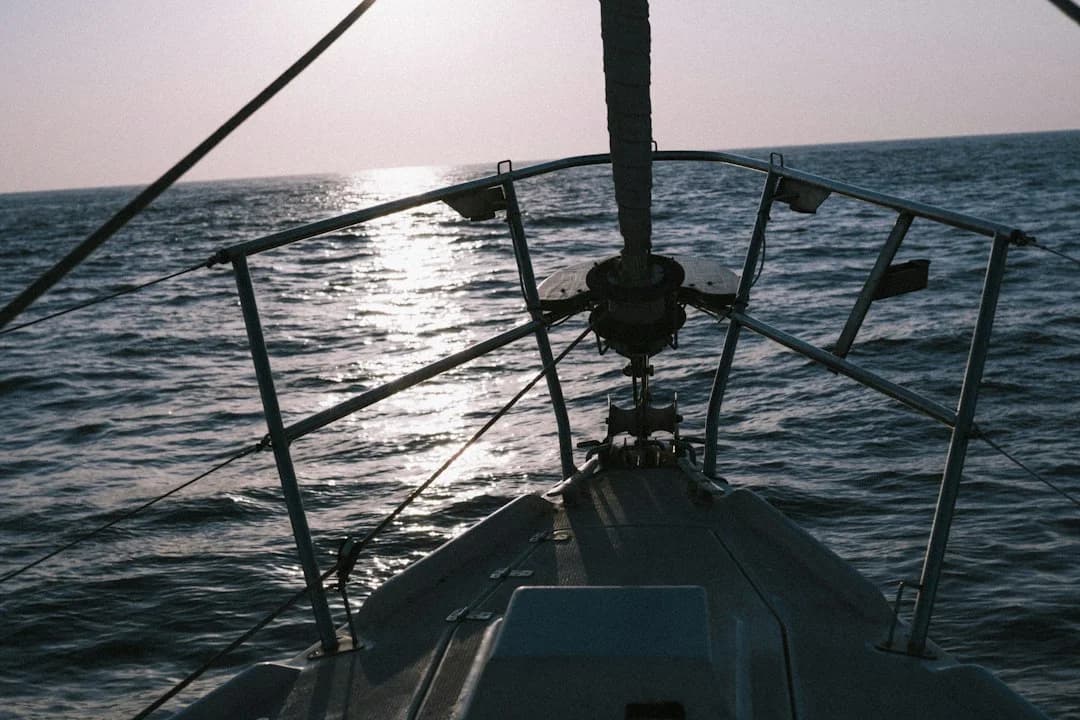
Photo by Ryan Geller on Unsplash
Why a Bahamian Moor Works in Reversing Current (and When It’s Wrong)
Reversing-current geometry: reducing lateral swing
A bahamian moor is two anchors set off the bow so the boat can pivot fore-and-aft as the current reverses. In a true flood/ebb cycle, your boat wants to point into the flow, then spin around when it flips. With one anchor you often get a wide, lazy “S” swing; with two anchors in line, you trade side-to-side sweep for a tighter footprint.
The key benefit is swing control, not raw holding power. Done correctly, the boat’s bow tracks between the two rodes with much less lateral shear into neighboring boats. In a crowded anchorage where everyone else is on a single hook, that reduced lateral swing is often the difference between sleeping and fender juggling at 0200.
Decision triggers: current strength vs wind strength
This setup shines when current dominates orientation and wind is light-to-moderate, say 5–15 knots while the current is doing the steering. When the wind overpowers the current, the boat starts yawing and “hunting” across the rodes, which increases snatch loads and chafe. Wind-against-current is the special kind of misery where the bow can’t make up its mind, and your gear pays for the indecision.
My rule of thumb: if the boat consistently lies to current for most of the cycle and the reversal is near 180°, a Bahamian moor is worth considering. If the wind is forecast to clock 60–120° overnight, you’re building a twist machine. At that point, a single well-set anchor with proper scope and snubber is often the safer, simpler bet.
When NOT to use it: wind shifts, swell, limited room
A Bahamian moor is the wrong tool in swell, because the boat can surge and snap the rodes alternately. It’s also risky where room is limited fore-and-aft; yes, lateral swing shrinks, but your footprint gets longer in line with the current. If you can’t lay out two anchors without crossing someone’s rode, don’t “make it fit” with optimism and a prayer.
Crowded mooring etiquette matters here because your swing geometry may differ from the boats around you. If everyone is on one anchor and you’re about to pin yourself on rails, tell your neighbors before you drop. It’s amazing how much conflict disappears when you communicate like an adult.
Finally, do a quick load path audit before you start: all steady load must end at backed cleats or a sampson post, not the windlass. That’s the whole spirit of ABYC H-41—windlasses are for lifting, not for living.
Tip box (crowd-tested): If your plan depends on “the wind probably won’t shift,” it’s not a plan. Choose a setup that still behaves when the forecast is wrong by 10–15 knots or 90°.
Gear Checklist and Sizing: Anchors, Rode, Hooks, Swivels, Chafe
Anchor and chain sizing that matches your windlass and WLL
For most cruising sailboats, the chain size is more about systems compatibility than bragging rights. Common practice is 5/16 in (8 mm) G43/G70 chain on 35–45 ft boats, and 3/8 in (10 mm) on many 45–55 ft boats. The non-negotiable detail: the chain must match the windlass gypsy and the manufacturer’s ratings, or retrieval becomes an expensive circus.
Anchor selection matters more than “two is better.” For a Bahamian moor, I prefer a modern scoop/spade primary (Rocna/Manson Supreme/Mantus-type category) and a secondary that’s similar or slightly smaller so it sets predictably. Typical sizing examples run 25–35 lb for 35–45 ft monohulls and 35–55 lb for 45–55 ft, but follow the maker’s table and adjust for displacement and windage.
Snubber/bridle materials and chafe protection layout
Your snubber is the shock absorber in the system, and that means nylon. Polyester is great for low-stretch control lines, but it’s suboptimal when your goal is reducing peak loads from yawing and short chop. Plan on 2–4 ft chafe sleeves at every contact point, and inspect them at least every 12–24 hours in sustained breeze.
Chafe management is not one product; it’s a layout. Look hard at the path through chocks, over toe rails, around bow rollers, and past any sharp stainless edges that somebody “rounded off” with a file in 2009. Your goal is a fair lead that doesn’t saw your snubber while the boat hunts.
Swivels and connectors: when they help—and when they don’t
Hooks and tensioners are useful because they let you shift the load off the chain and windlass cleanly. Basic chain hooks run $25–$80, premium chain grabbers/tensioners often land in the $80–$250 range, and swivels commonly cost $60–$300. The important part is not the price; it’s aligning WLL/MBL with your chain and expected loads, and avoiding side-loading.
Swivels can reduce twist, but they can also become the weak link if they’re undersized or misaligned. If you use one, it should articulate freely and be rated appropriately for the chain size, not “close enough” because it was on sale. A broken swivel at 0300 has a way of making you miss the days when you worried about your phone charger.
| Item | Common sizing / spec | Typical cost (USD) | Notes |
|---|---|---|---|
| Chain (G43) | 5/16 in: $3–$6/ft | Varies | Common on 35–45 ft boats |
| Chain (G43) | 3/8 in: $5–$9/ft | Varies | Common on 45–55 ft boats |
| Chain hook | Sized to chain | $25–$80 | Simple, effective load transfer |
| Premium chain grabber/tensioner | Sized to chain | $80–$250 | Better handling, often kinder on hands |
| Swivel | Properly rated & aligned | $60–$300 | Great when right; dangerous when wrong |
| Chafe gear | 2–4 ft sleeves | $20–$80 | Buy enough to rig both sides |
Step-by-Step Bahamian Moor Setup With Scope and Distance Examples
Pre-drop planning: depth, bow height, and room to lay two anchors
Scope starts with honest depth. You calculate from the bow roller (or chock) to the seabed, not chart depth, and you add tide range if you’ll be there through the high. Common targets are 5:1 settled, 7:1 overnight or higher wind, and 10:1 when it’s going to be sporty and you have room.
Before you drop anything, look at the fleet’s swing pattern and decide if your fore-and-aft footprint will interfere. A Bahamian moor reduces lateral swing, but it can occupy a long slot aligned with current. If the anchorage is tight, confirm you can lay two anchors without crossing others; if not, pick another spot or another method.
This is also where plan your route using a sea distance calculator earns its keep. If you’re planning a run into a tidal anchorage, use it to estimate arrival timing relative to slack water and fuel burn at reduced speed. Showing up at max ebb in a narrow anchorage is a great way to rush the job and regret it.
Two proven deployment methods (pick-up vs. ‘walk-back’)
Method 1: Pick-up (dinghy/second person). Set Anchor A first, pay out 5:1–7:1, and back down gently to ensure it’s dug. Then take Anchor B out in the dinghy and drop it roughly up-current (or down-current) in line with the expected reversal, leaving enough separation that the boat can sit between them without rodes crossing at the bow.
Method 2: Walk-back (singlehand-friendly with practice). Drop Anchor A, set it, then motor slowly forward along the line of current while retrieving some rode to keep it from belly-sliding sideways. When you’re far enough ahead, drop Anchor B and then drift/motor back, paying out and adjusting so the rodes lead cleanly and share load.
In both methods, the goal is rodes that are roughly parallel and separated at the bow, not twisted into a braided mess. Dedicated bow leads help, as does slow, deliberate veering rather than dumping chain in a heap. If the chain piles, it can kink and “jump” later under load.
Worked scope example and final trimming for clean leads
Here’s the math sailors actually use: water depth 12 ft plus bow height 4 ft equals 16 ft from bow roller to seabed. At 7:1, you want about 112 ft of rode out (16 × 7). If you’re laying two anchors, you’re still thinking in terms of effective scope from the bow to each anchor, not “total rode between anchors.”
After both anchors are down, do a set-and-proof step. Increase reverse power gradually—don’t go from idle to full astern like you’re trying to escape a bar tab. Watch for the bow to settle, feel the load stabilize, and confirm both rodes are sharing rather than one doing all the work.
Finish by transferring steady load off the windlass and roller to a snubber/bridle tied to properly backed cleats or a sampson post. That’s straight out of the intent of ABYC H-41 and the strong-point guidance in ABYC H-40 / ISO 15084. If your windlass is “holding the boat,” you’ve built a failure mode into the system.
Twist, Crossed Rodes, and Multi-Day Current Reversal Management
What twist looks like and why it builds in Bahamian moors
Some twist is normal because the boat weathervanes and the chain rolls as load alternates between flood and ebb. After 2–4 tide cycles, you may see the rodes start to wrap, especially if wind introduces yawing. The first warning is usually noise: chain grumbling over the roller, snubber creaking, and periodic snatch loads that feel sharper than yesterday.
At slack water, take ten seconds to eyeball lead angles. If the rodes are crossing at the bow and the cross is creeping closer to the stem each cycle, it won’t fix itself. Twist tends to accelerate because once the rodes are no longer fair, the boat hunts more, which adds more twist.
Swivel selection caveats and safer de-twist routines
A properly sized swivel can help, but it is not a magic wand. The swivel must be rated appropriately (WLL/MBL with margin), articulate freely, and not be side-loaded by offset leads or poorly aligned connectors. The failure mode is ugly: a side-loaded swivel can fracture, and now your “two-anchor safety plan” becomes a single point of failure.
A safer routine is planned de-twisting at slack. Ease one rode slightly while taking up on the other, letting the boat align, then reverse the process to unwind the wrap. Do it gently, with crew watching the bow; it’s a finesse job, not a winch race.
Reset and recovery procedures without diver intervention
If you can’t unwind safely from the bow, plan a reset rather than improvising. The cleanest time is at slack water with minimal wind, when the rodes are least loaded. Retrieve the more twisted anchor first, keeping the remaining anchor set as your safety brake.
Use chafe inspection as your hard stop. Check snubbers every 12–24 hours in sustained breeze, and replace any line showing glazing, melted fibers, or deep abrasion. Also watch hardware: a bent hook, a shifting cleat base, or a bridle leg that’s elongating in one spot is your cue to stop pretending it’s fine.
Tandem (Inline) Anchors: When More Holding Beats Less Swing
Tandem vs Bahamian: different problems, different geometry
The tandem anchoring technique solves a different problem than a Bahamian moor. Tandem is about increasing holding and reducing the chance of a total drag when wind loads build in a fairly steady direction. It does not materially reduce swing radius the way a two-anchor moor can, so don’t pick it for crowd control.
If you’re anchored where the wind is expected to stay within, say, 20–40° overnight, tandem can add security—especially in poor holding or when you’re limited on chain length. If the current reverses hard and the boat keeps spinning, tandem can actually complicate things by making retrieval and re-alignment harder.
How to rig inline anchors and set them effectively
Typical spacing is 20–40 ft, roughly 1–2 boat lengths for many cruisers. The forward anchor is connected to the primary anchor’s rode using a leader of chain or chain/rope combination sized for the expected loads and chafe environment. If there’s any chance the connection comes aboard through the bow roller, avoid bulky shackles that will jam exactly when you’re tired.
The setting sequence matters. Drop the forward anchor first, then pay out until the aft anchor is in position, then back down steadily so both bury in line. If you set the aft anchor first and then drag the forward one across it, you can foul your own gear in one easy lesson.
Failure modes unique to tandem setups
The biggest tandem headache is retrieval. The forward anchor can snag the rode or foul around the aft anchor, especially if the line gets slack and loops. Marking the rode and leader helps, and so does retrieving at lower load conditions when possible.
Another issue is false confidence. Two anchors inline can still fail if the bottom is trash or the anchors never truly set; you just doubled your effort, not your security. For sizing, the same manufacturer tables apply: think 25–35 lb for many 35–45 ft monohulls and 35–55 lb for many 45–55 ft, adjusted for displacement and windage.
| Setup | Primary goal | Best conditions | Typical geometry numbers |
|---|---|---|---|
| Single anchor | Simple, reliable holding | Mixed wind/current, adequate room | Scope 5:1–7:1 (up to 10:1 heavy weather) |
| Bahamian moor (two anchor moor) | Reduce lateral swing in reversing current | Current reversal near 180°, wind light–moderate | Two anchors fore-aft; manage twist |
| Tandem (inline) anchors | Increase holding power | Steady wind direction, poor holding | Spacing 20–40 ft; inline load path |
Proper Snubbers and Bridles: Length, Diameter, Attachment, Load Paths
Snubber/bridle sizing by boat type (mono vs cat)
A proper anchor snubber is cheap insurance against peak loads, noise, and hardware fatigue. On monohulls with all-chain, a longer snubber gives more nylon in play, which increases elasticity and reduces snatch loads in chop. Common practice is 20–35 ft of nylon, sized roughly 1/2 in for 30–40 ft, 5/8 in for 40–55 ft, and 3/4 in for heavier 50+ ft displacement boats.
Catamarans do better with a two-leg bridle to each bow cleat, because it reduces yaw and shares load. Bridle legs are often 12–25 ft plus chafe gear, and they may need to be longer if swell causes jerking under the bridgedeck. Keep the legs symmetrical; uneven legs create a permanent yaw angle and extra shock loading.
Nylon line is one of the few marine purchases that still feels like a bargain. Expect roughly $1.00–$2.50/ft for 1/2 in and $1.80–$3.50/ft for 5/8 in, with chafe gear budgeting $20–$80. That’s less than one night of repairs after a cleat starts working loose.
Attachment methods: hook, rolling hitch, chain stopper
A chain hook is clean and repeatable, especially with gloves on and sea state up. A rolling hitch on chain can work as a backup, but it’s more sensitive to technique, line type, and load cycling. A proper chain stopper is excellent if it’s installed and rated correctly, because it makes load transfer positive and keeps the hook from skating.
Whatever you choose, the end game is the same: the line must lead to backed cleats or a sampson post designed as strong points. That’s the practical application of ABYC H-40 and ISO 15084, with ABYC H-41 reminding you the windlass is not a strong point. If your windlass is taking shock loads, you’re using it outside its intended job.
Chafe protection and fairlead geometry
Chafe is the killer you don’t notice until you smell hot nylon. Put 2–4 ft sleeves where the snubber passes through chocks or touches toe rails, and make sure the sleeve can’t slide away from the rub point. Inspect at least every 12–24 hours in sustained breeze, and don’t talk yourself into “one more night” if the fibers are glazing.
Do a quick load path audit every time you rig: follow the force from chain to hook to snubber to cleat, and list every item in series. If any one item is smaller, poorly backed, or corroded, that’s your weak link. The safest anchoring systems fail “soft” by stretching nylon, not “hard” by cracking stainless.
Tip box (load path audit): If the chain hook breaks, you lose the snubber but not the anchor. If the cleat backing plate fails, you may lose the boat. Put your money and attention where the consequences are worst.
Crowded Anchorage Tactics: Swing Radius Math, Alarms, Etiquette, COLREGs
Swing radius and clearance: quick calculations that prevent conflicts
Most anchoring conflicts are geometry errors, not bad luck. A quick swing radius estimate is rode length deployed + LOA/2. With 150 ft of rode and a 42 ft boat, your radius is about 171 ft (150 + 21), before you add GPS error, yawing, or a neighbor’s questionable scope choices.
A Bahamian moor changes that footprint. You’ll usually reduce lateral swing, but you extend your occupied space fore-and-aft along the current line. So you need to check clearance in both directions, not just side-to-side, and you need to think about how your neighbors will swing if they’re on a single hook.
Anchor alarm settings: GPS radius, depth trends, and false alarms
Set your anchor alarm radius from the math, then add margin. In crowded anchorages I often add 20–40 ft to account for GPS wander and the fact that the boat will not sit at the exact center of the circle. If the boat is yawing in wind-against-current, you’ll see bigger apparent excursions that aren’t actual dragging.
Use trends, not panic. If the alarm trips but your depth is stable and your relative bearings to shore aren’t walking, it may just be yawing. If the alarm trips and depth is changing by 2–3 ft in the wrong direction while wind is building, get out of the bunk and look.
Night rules and communication: staying predictable in tight quarters
In dense anchorages, your best safety equipment is being predictable. Talk to nearby boats before you deploy a two-anchor rig, especially if your swing pattern will differ from the local norm. Also plan retrieval: don’t be the boat that motors through the fleet at dawn with a rode trailing like a sea monster.
On the legal and practical side, comply with COLREGs Rule 30 for anchor lights. It’s not about being “by the book” for its own sake; it’s about preventing the late-arriving charter boat from aiming at your dark silhouette. USCG regulations don’t dictate your anchoring technique, but the collision rules and basic seamanship expectations absolutely apply when you’re stationary in traffic.
This is also where pre-arrival planning pays off. Use a quick tool to calculate the distance between ports to time your arrival for slack, and to sanity-check fuel consumption based on the voyage distance if you’ll be maneuvering in current for 20–40 minutes before you’re set. Coming in rushed is how people drop anchors on top of each other.
Failure Modes and Safety Checks: Chafe, Cleats, Windlass Overload, Dragging
Most common failures and what they look/sound like early
The most common failure is simple: chafe-through. You’ll often hear it first as a change in rhythm—snubber squeaking, then snapping taut, then squeaking again. Next on the list is hardware deformation: chain hook opening, shackle pins backing out, or a cleat that starts “working” and weeping brown water from the base.
Windlass overload is the expensive silent one. If the chain stays bar-tight to the gypsy and you never transfer load to a snubber or chain stopper, you’re betting against ABYC H-41. Windlasses are for lifting chain, not absorbing shock loads for days.
Storm and squall procedures: when to add scope, kellet, or reset
When conditions build, you need an escalation plan that matches your room. Increase scope to 7:1 for overnight/high winds and up to 10:1 for heavy weather, measured from bow roller to seabed. If you don’t have room for more scope, your “plan” is already constrained, so consider a reset in better bottom or a different anchorage.
A kellet/sentinel can help reduce snatch in chop by increasing catenary, especially with all-chain. Typical weights are 10–30 lb, and a realistic cost is $60–$250 including retrieval hardware and line. It’s not a substitute for proper scope, but it can be a useful tool when the chop is short and sharp.
Retrieval plan in current: avoiding wrap, shock-load, and collisions
Two-anchor systems demand a retrieval plan before you ever go below. Mark rodes, keep hands clear, and retrieve at slack water when possible to reduce load and twist. If you must retrieve in current, go slow and avoid powering over your own lines, because that’s how props eat rodes and friendships.
Build the system so it fails gracefully. Nylon stretch buys you time; metal fracture buys you a mayday. Keep loads on strong points per ABYC H-40 / ISO 15084, and keep the windlass out of the load path per ABYC H-41, even when you’re tired and it’s tempting to “just leave it.”
Conclusion: Choose the Right Geometry, Then Protect the Load Path
Use a single anchor when conditions are mixed, room is adequate, and you want simplicity with a good snubber and smart scope. Use a bahamian moor when current reverses around 180° and you need less lateral swing in a crowded anchorage, accepting that twist management becomes part of your daily routine. Use the tandem anchoring technique when you need more holding in a steady load direction, and you can tolerate the added complexity during retrieval.
Three pillars keep you out of trouble in crowds. First is correct geometry: honest scope calculations and swing-radius math, not vibes. Second is controlled load paths: snubbers/bridles to backed strong points per ABYC/ISO, never the windlass. Third is disciplined monitoring: chafe checks every 12–24 hours, twist awareness at slack, and anchor alarms that account for yawing and GPS wander.
Pre-arrival, do the boring work while it’s still daylight. Use Breezada’s sea distance calculator to plan arrival near slack, then pick your spot with enough room for your intended footprint. Once you’re committed, set deliberately, proof under power, transfer the load properly, and sleep like someone who expects the tide to change its mind.
Frequently Asked Questions
In a Bahamian moor setup, how do you calculate scope: per anchor (bow-to-seabed) or as total rode between anchors, and how does tide range change the minimum safe rode?
Calculate scope based on bow-to-seabed distance for the working rode to each anchor, not as “total rode between anchors.” Use settled targets around 5:1, 7:1 overnight, and 10:1 heavy weather, and add expected tide height to depth before calculating. If tide range is 3–5 ft, that extra depth can add 21–35 ft of rode at 7:1, which is enough to matter in crowds.
What tandem anchoring technique leader (chain vs rope/chain) best avoids shock-loading the forward anchor, and what are practical connection methods that won’t jam in the bow roller?
All-chain between anchors resists chafe well, but it transmits shock loads unless your main system has a proper nylon snubber. A rope/chain leader can add some damping, but it must be protected from chafe and sized for load, and the rope section should not be asked to run through the bow roller. For connections, keep hardware low-profile and retrieval-friendly; avoid bulky shackles that can jam at the roller, and consider configurations that keep the connection outside the gypsy path.
For an all-chain rode, what snubber length (20–35 ft) measurably reduces snatch loads in short chop, and how do you verify the windlass is fully unloaded per ABYC H-41?
A nylon snubber in the 20–35 ft range gives enough stretch to noticeably reduce snatch loads and chain noise, especially when the boat is yawing in short chop. To verify the windlass is unloaded, pay out a touch of chain after the snubber is set so the chain is visibly slack at the gypsy and the load is clearly on the cleats/strong point. ABYC H-41’s intent is straightforward: the windlass should not be the primary load-bearing device.
How do you set anchor alarm settings (radius and drag sensitivity) when your calculated swing radius is 171 ft and the boat is yawing in wind-against-current?
Start with the calculated 171 ft radius and add a margin, commonly 20–40 ft, to account for GPS wander and yaw excursions. If your alarm supports sensitivity or filtering, reduce sensitivity to avoid constant false alarms during wind-against-current yawing, and cross-check with depth trends and shoreline bearings. If the alarm triggers repeatedly and your position trend “walks” in one direction over 2–3 cycles, treat it as potential drag, not just yaw.
When using an anchor swivel for twist management, what minimum WLL/MBL margin and articulation requirements prevent side-loading failures during repeated tidal current reversal cycles?
Use a swivel that matches your chain size and has a conservative WLL/MBL margin relative to expected peak loads, not just average anchoring loads. It must articulate freely so it isn’t forced into side-loading as the boat yaws and the lead angle changes through each reversal cycle. If the swivel binds, sits at an angle, or becomes the smallest-rated component in the system, it’s not twist management—it’s a planned failure point.
About the Author
Related Articles
Best Radar Reflector for Sailboat: Active vs Passive
Compare active vs passive radar reflectors for sailboats, mounting tips, and real-world results. Choose the best radar reflector—read now.
By Breezada Team
Sail Trim for Beginners: Main + Jib Cruising Guide
Learn sail trim for beginners with simple main + jib settings, telltales, twist, traveler & vang. Get quick wind-based trims—read now.
By Breezada Team
Sailboat Bimini Guide: Dodger & Enclosure Choices
Learn how to choose a sailboat bimini, dodger & cockpit enclosure—materials, fit, costs, and DIY vs pro. Get the right setup today.
By Breezada Team
Code Zero vs Genoa: Jib & Spinnaker Guide
Compare Code Zero vs genoa, jib, and spinnaker by wind range and angle. Choose the right headsail for your boat—read the guide now.
By Breezada Team