
Sailboat Rigging Inspection Checklist & Replace Guide
Rigging doesn’t “sort of” fail. Standing rigging tends to fail all at once, usually when you’re far from the dock and busy being impressed with yourself. This sailboat rigging inspection guide is the checklist I use to catch the boring early signs—before they turn into an exciting afternoon with bolt cutters and a jury-rigged backstay.

Photo by Ian Keefe on Unsplash
Standing vs Running Rigging: Loads, Modes, and Risks
Standing rigging is the fixed structure: shrouds, stays, terminals, turnbuckles, chainplates, tangs, and mast step. It carries compressive and tensile loads from the mast into the hull, and it does it 24/7 even when the boat’s “resting.” Typical cruiser wire is 1x19 316 stainless, commonly 1/8 in (3.2 mm) to 5/16 in (7.9 mm) depending on boat size and design. Rod rigging is a different animal; it can be excellent, but inspection and replacement practices are specialized and not “wire plus swages.”
Running rigging is the moving stuff: halyards, sheets, reefing lines, vangs, travelers, control lines. Its load path is usually masthead → sheaves → clutches → winches, and it’s full of bends, friction, and operator error. Failures are more often progressive: chafe, UV, heat glazing, cover slip, or a splice that slowly gives up on life. When a sheet parts you usually round up, swear, and continue sailing; when a cap shroud lets go, the mast often tries to exit the boat.
Here’s the hard truth behind the standing vs running rigging inspection difference: standing rigging hides damage where you can’t see it. Stainless likes crevice corrosion in low-oxygen wet spots—inside swage mouths, under tape, and at chainplate deck penetrations—so the outside can look “fine” right up to the moment it isn’t. That’s why removing boots and tape isn’t optional in any real standing rigging inspection checklist.
For cadence, I like a three-layer system: a pre-season baseline (the full checklist), monthly quick checks (10 minutes, eyes and hands), and a pre-offshore deep inspection triggered by miles, storms, or any new noise aloft. Add event-driven inspections after knockdowns, lightning strikes, hard groundings, dismastings nearby, or a day of uncontrolled flogging that sounded like the rig was being punished for past sins. And yes, the insurance/rigger rule-of-thumb still matters: stainless standing rigging on cruising boats is often treated as a ~10-year item, shorter for charter or heavy-use programs.
Deck-Level Standing Rigging Inspection Checklist (Step-by-Step)

Photo by Marc Wieland on Unsplash
Before You Touch Anything: Safety and Setup
Start with the boat secured: calm dock, spring lines on, and no ferry wakes trying to “help.” Unload the rig as practical—ease halyards, center the boom, and secure it with a topping lift and a preventer so it doesn’t swing while you’re forward. If you’re moving on deck, use sane deck safety practices; ABYC H-41 is a good reminder that handholds and safe movement matter more than bravado. I also like to do the first pass with bare hands, then a second pass with gloves so I can feel wire issues without donating blood.
Do a slow 360° walkaround and sight up each shroud and stay. You’re looking for kinks, “S” bends, shiny abrasion at spreader tips, and any terminal that looks slightly cocked under load. Check wire where it meets spreaders, mast bands, and any point where the angle changes. If you see rust staining, don’t file it under “stainless does that”—stainless stains when something is wrong, or when it’s trapped in a crevice long enough to get ideas.
Turnbuckles, Toggles, and Pins
Turnbuckles should articulate through toggles; missing toggles create bending fatigue, especially at swage studs and chainplates. Inspect body cracks, bent studs, galled threads, seized barrels, and elongated clevis pin holes. For thread engagement, don’t run “max open” turnbuckles: a common practice is at least 1× the thread diameter engaged per end, and many riggers aim for ~1.5×–2× for margin. Record exposed thread length or count visible threads so you can track changes in a rig log.
Confirm cotter pins and rings are installed and not work-hardened into brittle little weapons. I replace suspect cotters as a matter of routine because they cost $1–$5, and losing one can cost your mast. Also check for sharp cotter ends that can chew sails or skin; bend and tape ends neatly, but don’t mummify the entire fitting in tape where corrosion can hide.
Chainplates and Bulkhead Load Paths
Chainplates are where rig loads enter the boat, and they fail more often from deck-level crevice corrosion than from dramatic overload. Inspect at the deck penetration for cracked sealant, staining, and any movement under load; even 1–2 mm of working at the deck is a red flag. Then go inside with a bright light and look for wet core, rust trails, crushed backing plates, and bulkhead/tabbing cracks where the load spreads into the hull. ISO 12215 is useful context here: it’s about load paths and structure, and chainplates are absolutely part of that structural story.
ABYC H-40 (strong points) is also worth mentioning—not because it tells you how to rig a sloop, but because it reinforces the idea that fittings and structure must take repeated cyclic loads. If the chainplate is fine but the bulkhead is soft, you still have a rig problem. Treat chainplate leaks aggressively; water intrusion is patient, and it always gets a vote.
Tip box: Deck-level “replace now” triggers
If the rag test snags on “meathooks,” if a chainplate shows movement at the deck, or if a turnbuckle is bent or seized, stop debating and start planning replacement. Standing rigging doesn’t reward optimism.
Go-Aloft and Mast Inspection: Masthead to Mast Step

Photo by Tanner Mardis on Unsplash
A competent sailboat mast inspection aloft is not a quick glance and a thumbs-up. It’s a hands-on check of sheaves, pins, terminals, spreader roots, tangs, lights, antennas, and wiring exits, plus photos you can review later. If you’re not comfortable being hoisted 40–70 ft in a bosun’s chair or you don’t have a trustworthy winch operator, hire a pro; in the U.S., a typical professional inspection often runs $250–$600 depending on mast height and region. That’s cheap compared to replacing a mast after a preventable failure.
Masthead: Sheaves, Pins, Antennas, and Terminals
Start with the sheaves: check for side-to-side slop, chipped edges, and grooves sharp enough to act like a rope knife. Look at axle pins and retainers; bent pins and missing keepers happen more often than people admit, especially after DIY work. Inspect for halyard wrap scars around the headstay area—if you see aluminum damage or deep scoring, you’ve had loads in places they don’t belong.
Now inspect headstay and backstay terminals for alignment. A terminal that’s been side-loaded will often show odd wear patterns, elongated holes, or a slight “banana” look to a toggle. Check wind instruments and antennas for loose fasteners and corrosion halos; dissimilar metal corrosion loves stainless fasteners in aluminum spars. If you’ve got a furling swivel, inspect it for smooth rotation and play, because a sticky swivel telegraphs trouble down to the foil and forestay.
Spreaders, Tangs, and Wire Chafe Points
Spreader tips are classic chafe points, and riggers see them constantly. Look for worn boots, cracked plastic, exposed metal edges, and wire polished bright from movement. At the spreader root, check fasteners for corrosion, especially where stainless screws meet aluminum; you’ll often see white powder (aluminum oxide) and weeping stains. A small crack at a tang can propagate fast under cyclic load, so use a flashlight and inspect around bolt holes and bends.
Also check alignment: spreaders should bisect shrouds cleanly without forcing the wire to “dogleg.” Doglegs concentrate stress in 1x19 wire, which hates bending fatigue. If your shrouds are rubbing the spreader tip even at the dock, they’re doing worse at 25–30 knots with the rig pumping.
Mast Step Corrosion and Electrical Bonding
Mast steps fail quietly until they don’t. Look for corrosion, cracking, compression of the step area, and poor drainage; trapped water at the base accelerates aluminum corrosion and can attack stainless fasteners. If you see advanced corrosion, deformation, or cracking, that’s a strong trigger to unstep the mast for a full assessment. Don’t let someone “patch” structural mast step damage with sealant and optimism.
Bonding and lightning protection are part of this story. ABYC TE-4 provides context: bonding conductors and mast base connections matter, and damaged or overheated conductors can correlate with corrosion at the step after a strike. After lightning, inspect bonding straps, the mast base, and any evidence of heat or arcing at through-bolts. Lightning can also leave you with hidden cracking around fasteners—no drama, just future failure.
Common Failure Points: Swages, Furlers, and Chainplates

Photo by Pawel Kadysz on Unsplash
This is where most real-world rig failures start: not in the middle of a shroud, but at transitions and hidden wet zones. Learn failure modes and you’ll spot trouble early, instead of admiring shiny wire and calling it good. The riggers I trust all repeat the same list: swage exits, chainplates at deck level, forestay at the furling drum/top swivel, spreader tips, and toggles/clevis pins with elongation or corrosion. None of these failures are exotic; they’re repetitive fatigue plus moisture and misalignment.
Swage Fittings: What ‘Weeping’ and ‘Necking’ Mean
Swages usually crack where the wire exits the terminal because that’s where bending stress concentrates. “Weeping” often looks like brown tea staining that returns after you clean it; it’s corrosion products bleeding out of the swage mouth. “Necking” (waisting) is visible narrowing or distortion of the terminal or wire right at the exit, sometimes with a slight step you can feel with a fingernail. Add in a tiny crack line at the exit, and you’re no longer in the monitoring business.
Do the rag test properly: run a rag along the wire with light pressure, especially near terminals and spreader tips. If it snags, you’ve got broken strands—those sharp “meathooks.” On standing rigging, any broken strand is typically treated as replacement-required, not “let’s see how the season goes.” You can’t un-break wire, and it rarely breaks only one strand for fun.
Furling Forestays: Hidden Wire and Foil Joint Issues
Furling headstays hide the most important wire in the least visible way. You can inspect the bottom near the drum and the top near the swivel, but the wire between lives inside the foil where corrosion can work in peace. Check the drum entry area for staining and broken strands, and check the top terminal under the foil/top swivel as best you can with a mirror or camera. If the furling line feels uneven, the foil has a “click” under load, or furling gets stiff in 15–20 knots, don’t blame it on “old bearings” without checking the stay.
Foil joints matter too. Inspect joint fasteners and look for elongation, missing screws, or a joint that’s migrated; a misaligned foil can side-load the stay and the top swivel. Symptoms that justify partial disassembly include persistent rust stains at joints, uneven furl, and any hint of wire damage at either end. Pulling a foil is tedious, but it’s less tedious than a forestay failure in a crowded anchorage.
Chainplates at Deck Level: The Hidden Corrosion Trap
Deck-level chainplate crevices are oxygen-starved, wet, and often wrapped in tape “to protect them.” That’s the perfect recipe for stainless crevice corrosion you can’t see until it’s advanced. Remove tape and boots as a checklist step, inspect the metal, and then re-cover only if you can keep it dry and inspectable. If the deck penetration sealant is cracked, water will migrate down the chainplate, wet the core, and rot or delaminate surrounding structure.
Inside the boat, inspect bulkhead tabbing and backing plates. Look for cracking along the tabbing edge, dark staining, and fasteners that have started to “print” through the wood. Even a small amount of moisture intrusion can reduce strength dramatically over time, especially in plywood bulkheads. If you find movement under load, corrosion at the deck line, and wet structure inside, you’re beyond polishing and praying.
Running Rigging Inspection: Chafe, Heat, and Geometry
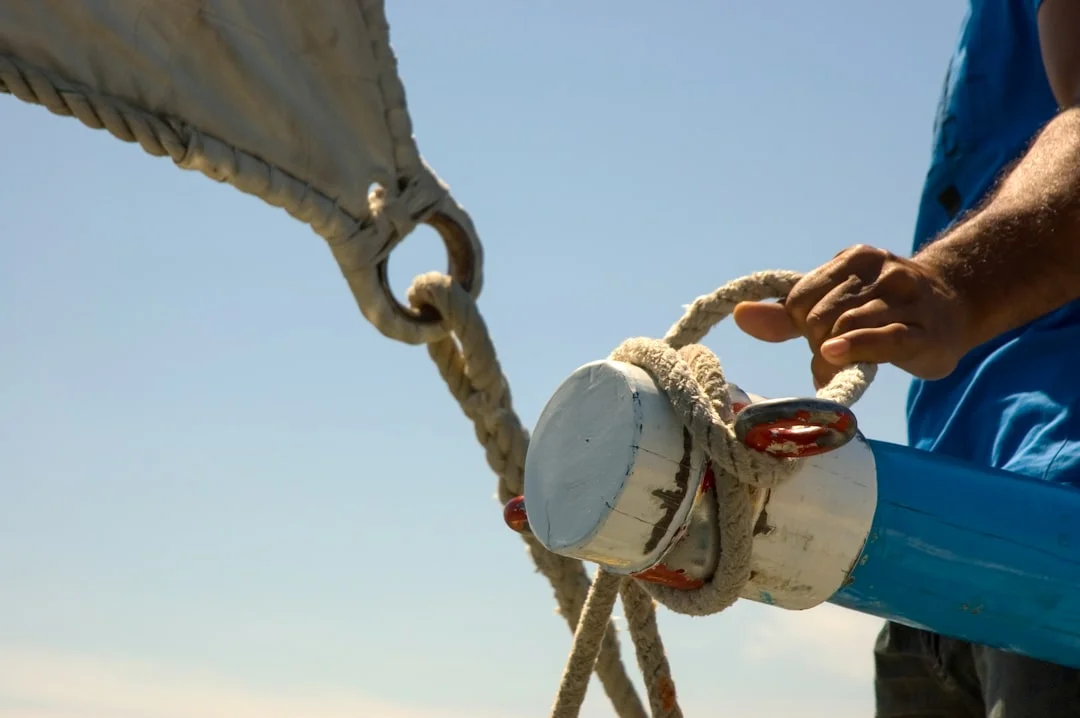
Photo by Eduardo Goody on Unsplash
A good running rigging inspection focuses on chafe zones and geometry, not just the first 10 ft you can see on deck. Most cruising boats use polyester double braid for sheets and often a polyester/Dyneema blend for halyards. HMPE (Dyneema) is strong and low-stretch, but it’s not magic; tight bends, heat, and bad clutch choices can eat strength fast. For planning, many cruisers replace heavily used halyards and sheets on a ~3–7 year cycle, but chafe often forces earlier replacement.
Halyards and Sheets: Cover Wear vs Core Damage
Cosmetic fuzzing is normal; it’s the line sacrificing its outer fibers to protect what matters. What isn’t normal is lumpiness over sheaves, a flat spot where a clutch grips, or cover slip where the core migrates and the line diameter changes. If you see localized thinning, stiffness, or melted-looking fibers, open the cover if possible and inspect the core. Check splices and terminations—especially around shackles and knots—because a great rope with a bad termination still fails like a bad rope.
With Dyneema-cored lines, remember the strength numbers are impressive on paper but conditional in use. A typical 6 mm SK78 12-strand line might be rated around 5,000–6,500 lb (22–29 kN) depending on brand, but that rating drops with tight bend radii, heat, and abrasion. If you’re using small sheaves or aggressive clutches, treat published break strengths as “best case,” not a promise.
Clutches, Jammers, and Heat Glazing
Glazing is heat damage, usually from clutch slip under load. It looks shiny, hardened, and sometimes slightly flattened, and it often comes with a burnt-plastic smell that you’ll remember forever. If a clutch is sized wrong for line diameter, or if you’re routinely loading it beyond its comfort zone, you’ll see glazing in months, not years. Replace or upgrade hardware if the line is telling you the system is mismatched.
Check clutch jaws for sharp edges and uneven wear. A worn cam or jaw can act like a serrated blade, especially on polyester covers. Also check the lead angle into the clutch; side-loading can cause the line to saw against the clutch body and generate heat even without obvious slipping.
Sheaves and Blocks: D/d Ratios and Fatigue
Rope hates small sheaves. A common rule from rope makers is D/d ≥ 8:1 for polyester double braid, and ≥ 8:1–10:1 for HMPE, depending on construction and cover. That means a 10 mm line ideally wants an 80–100 mm sheave, not the tiny masthead wheel that came on a 1980s cruiser. Undersized sheaves show up as accelerated cover wear at the same point in each cycle, stiffness, and core fatigue that you can feel as a lumpy section.
Inspect blocks for bearing play, cracks, and side-loading marks. A block that twists under load can force a line onto a cheek or pin, cutting it from the side. If you’re planning passage distances and fuel or engine-hour contingencies, check the nautical miles for your planned route so you can better estimate your fuel needs based on the voyage distance—and it also helps you estimate how many hoists, reefs, and sail changes your running rigging will see over a given itinerary.
When to Replace Standing Rigging: Age, Events, and Red Flags
Standing rigging replacement isn’t a calendar-only decision; it’s risk management with consequences. Age matters, environment matters, and usage matters more than most dock talk admits. Coastal daysails in 12–18 knots are not the same as beating for 36 hours in trade-wind chop, even if the boat length is identical. The goal is to replace before the rig decides for you.
The 10-Year Rule (and Why It’s Not Enough)
The ~10-year rule for cruising stainless standing rigging exists because it’s broadly defensible for insurance and typical use. But it’s not a guarantee of safety, and it’s not a universal cliff either. A well-built rig in freshwater with meticulous inspection may go longer; a charter boat with constant load cycling may need replacement sooner, sometimes 5–8 years depending on conditions and records. If you don’t know the rig’s age, assume it’s older than advertised and inspect like you’re paying the deductible.
Wire size doesn’t save you from crevice corrosion. For context, approximate 1x19 316 breaking strengths are often cited around 1/8 in ≈ 1,780 lb (8.0 kN), 5/32 in ≈ 2,600 lb (11.6 kN), 3/16 in ≈ 3,700 lb (16.5 kN), and 1/4 in ≈ 6,400 lb (28.5 kN) (manufacturer-dependent). Those numbers are comforting until you remember fatigue and corrosion don’t ask permission before reducing strength.
Replacement Triggers That Override Age
Some findings are non-negotiable. Replace standing rigging if you find any broken strand, a cracked swage, pronounced “necking,” severe crevice corrosion at terminals, or elongated pin holes at toggles and tangs. Replace or rebuild turnbuckles if studs are bent, barrels are cracked, or threads are seized or heavily galled. Hardware that can’t articulate properly forces bending into wire and terminals, accelerating fatigue.
Also consider consequence. If you’re planning an offshore passage, the replacement threshold is lower because the cost of failure is higher. Use plan your route using a sea distance calculator when planning legs; longer legs mean fewer bail-out points, which changes how conservative you should be with rig decisions. The ocean doesn’t care that the marina mechanic thought it “looked okay.”
After-Event Protocol: Knockdowns, Lightning, Groundings
After a knockdown, inspect chainplates, tangs, spreader roots, and terminals first. Shock loads can start cracks at fastener holes and swage exits that aren’t obvious until later. De-tape and de-boot suspect areas and re-inspect in good light; hidden corrosion and hairline cracks don’t show well at dusk with a headlamp. After a grounding, also inspect the mast step and compression post area for movement, cracking, and new leaks.
After lightning, treat the rig like it’s been in a bar fight. Check bonding conductors and mast base connections in the spirit of ABYC TE-4, and look for arcing marks at chainplates and through-bolts. Electronics failures get attention, but structural and corrosion-related effects can be the longer tail risk. If anything at the mast step looks advanced or deformed, unstep the mast and inspect properly—this is not the time for guesswork.
Costs, Planning, and Post-Inspection Rig Tune Checks

Photo by Davide Baraldi on Unsplash
Most owners don’t fail at inspection—they fail at planning. A good inspection produces a 1-year list (fix now), a 5-year list (budget and schedule), and a monitor list (document and re-check). Costs swing with mast height, number of stays, terminal type (swaged vs mechanical), furling complexity, and yard access. Unstepping becomes cost-effective when you’re doing chainplates, mast step repairs, major rewiring, or you’ve got multiple terminals you can’t inspect confidently.
Here are realistic U.S. cost bands I see most often:
| Item | Typical U.S. Cost Range | Notes / What Drives Price |
|---|---|---|
| Professional rig inspection (deck + aloft visual) | $250–$600 | Mast height, travel, photos/report detail |
| Dockside tune after inspection | $300–$900 | Number of adjustments, access, seized turnbuckles |
| Unstep + step mast (30–40 ft boat) | $800–$2,500 | Crane time, yard rates, haul-out/storage impacts |
| Standing rigging replacement (30–35 ft sloop, 1x19 wire, swaged) | $4,000–$10,000 | Terminal count, new turnbuckles/toggles, chainplate work |
| Standing rigging replacement (40–45 ft sloop/cutter) | $8,000–$20,000+ | Inner stays, furlers, access, rod rigging, custom fabrication |
| New furling forestay (parts only) | $300–$900 | Wire size, terminals, foil/swivel compatibility |
| Turnbuckle replacement (each) | $80–$350 | Size, open vs closed body, bronze vs stainless |
| Clevis pins / toggles (each) | $5–$60 | Size, articulation needs, corrosion resistance |
| Chainplate fabrication (each) | $150–$900+ | Simple strap vs complex geometry, polish, material thickness |
| Halyard or sheet (polyester double braid, 100–150 ft) | $120–$450 | Diameter, brand, splices |
| Dyneema-cored halyard (100–150 ft) | $200–$700 | Core/cover choices, chafe cover length, splicing labor |
After any significant adjustment or replacement, do a rig tune check after inspection. Confirm the mast is centered, rake is consistent with the design, and pre-bend suits your sailplan. Many 1x19 setups start with uppers around 10%–20% of wire breaking strength as an initial band, but the correct numbers depend on the boat, rig type, and rigger guidance. When you’re done, re-check cotter pins and rings—because a perfectly tuned rig with a missing cotter is just a countdown timer.
If you’re planning a longer trip, use calculate the distance between ports to build a realistic itinerary. That helps you decide what to replace before departure versus what can be monitored, based on distance, stop options, and expected conditions.
Frequently Asked Questions
For 1x19 316 wire, what specific visual/tactile indicators at a swage exit (necking, rust weeping, strand cracks) warrant immediate replacement versus monitoring?
Immediate replacement is warranted if you see cracks at the wire exit, any broken strand, obvious necking/waisting, or recurring rust “weeping” that returns after cleaning. Monitoring is only reasonable for superficial staining that does not return and shows no deformation, but staining at a swage mouth is often the first visible symptom of crevice corrosion. If the rag test snags near the terminal, treat it as done.
How do I verify turnbuckle thread engagement correctly (minimum 1x diameter per end, preferred 1.5x–2x), and what measurements should I record in a rig log before tuning?
Measure the thread diameter (or identify it from the turnbuckle spec), then ensure each end has ≥1× diameter engaged, preferably ~1.5×–2×. Record: exposed thread length on both studs (or count visible threads), turnbuckle body position, cotter type/location, and any asymmetry port vs starboard. Also record mast rake and whether the mast is centered at the partners, so you can detect changes over time rather than re-tuning from scratch.
On a furling headstay, how do I inspect the top terminal and wire under the foil/top swivel, and what symptoms justify pulling the foil to check for broken strands or crevice corrosion?
Use a mirror or phone camera to inspect under the top swivel and at the upper terminal as far as the foil allows, looking for tea staining, cracks, and strand damage. At the drum area, inspect the wire entry and lower terminal the same way. Symptoms that justify pulling the foil include persistent staining at either end, stiff/uneven furling, a foil joint that’s migrated, or any evidence of strand damage near the drum or top swivel; those are strong hints the hidden section is compromised.
What D/d (sheave diameter to rope diameter) should I use for polyester double braid versus HMPE (Dyneema) halyards, and how does undersized sheaves show up as cover glazing or core fatigue?
A common guideline is D/d ≥ 8:1 for polyester double braid and ≥ 8:1–10:1 for HMPE, depending on rope construction and maker recommendations. Undersized sheaves tend to create repeat wear at the same point: glazing, flattened sections, stiffness, and lumpiness where the core fatigues. With clutches, heat glazing often indicates slip or too-small hardware gripping too much load.
After a knockdown or lightning strike, which specific rig components (chainplates, mast step, tang fasteners, electrical bonding conductors) should be inspected first, and what non-obvious damage patterns are common?
After a knockdown, inspect chainplates (deck and interior), tang fasteners, spreader roots, and swage exits first, because shock loads start cracks at holes and transitions. After lightning, inspect bonding conductors and mast base connections (ABYC TE-4 context), plus chainplates and through-bolts for arcing marks and heat effects. Common non-obvious damage includes hairline cracks around tang bolt holes, newly working deck penetrations at chainplates, and accelerated corrosion at the mast step due to compromised coatings or overheated connections.
About the Author
Related Articles

French Canals Boat Trip Guide Beyond Canal du Midi
Plan a french canals boat trip beyond the Midi with routes, costs, licenses & lock tips. Compare regions and map your itinerary—start now.
By Breezada Team

Marine Toilet Smells: Eliminate Odors in Hoses & Vents
Stop marine toilet smells fast—diagnose hoses, vents, joker valves, and cleaning routines. Follow this guide and fix odors for good today.
By Breezada Team

Anchor Light Rules for Sailboats & Best LED Options
Learn anchor light rules (COLREGS/USCG) and choose the best LED anchor light. Avoid common mistakes—use our quick checklist today.
By Breezada Team

Composting Toilet Sailboat: Manual vs Electric vs Composting
Compare marine head options—manual, electric, composting—costs, rules, and odor control. Choose the right setup for your boat. Read now.
By Breezada Team