Anchor a Sailboat Safely: Scope, Set, Swing Room

Anchor a Sailboat Safely: Scope, Set, Swing Room
Safe anchoring isn’t a single trick—it’s a system. Get the scope right, set the anchor like you mean it, and leave enough swing room that you don’t spend the night doing geometry in your underwear while your neighbor “politely” shines a spotlight at your bow.
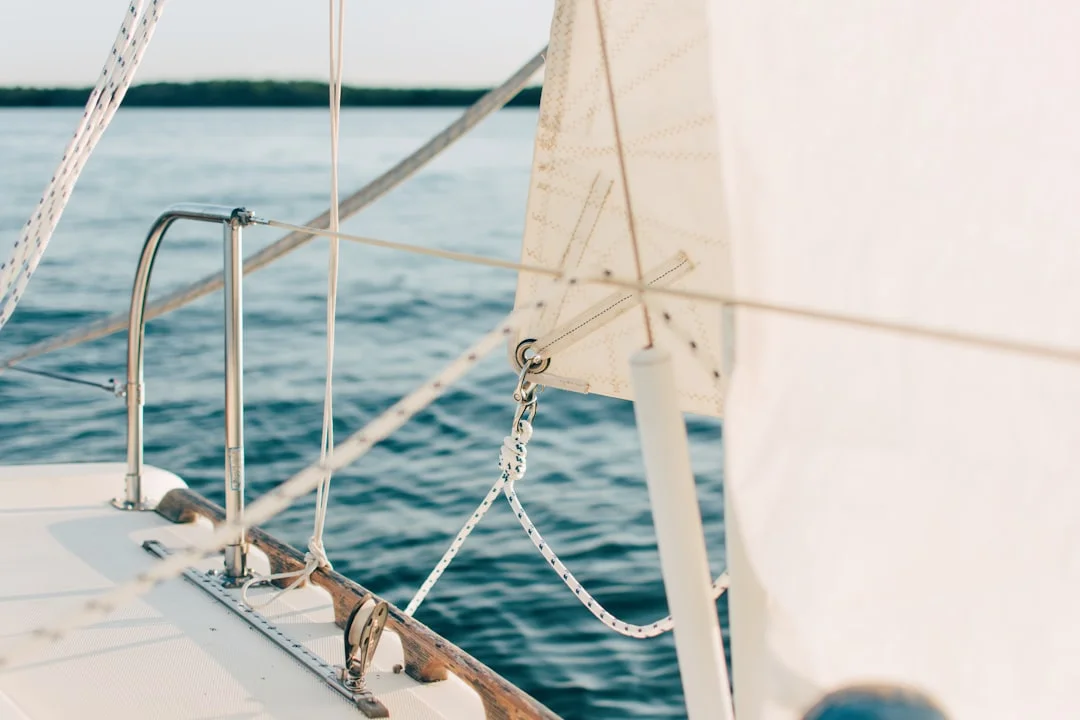
Photo by Ian Keefe on Unsplash
Practical tip box — the “scope / set / swing” workflow
- Pick the spot: holding-friendly bottom, protected from forecast wind, and enough downwind drift room to recover if you drag.
- Calculate scope correctly: use depth + predicted tide + bow roller height (often 3–6 ft) before you pick 5:1 / 7:1 / 10:1.
- Set and verify: pause around 3:1, then back down 1,200–2,000 RPM for 30–60 seconds and confirm with ranges/GPS.
- Confirm swing clearance: radius ≈ rode paid out + LOA, then add a buffer for yaw and GPS error.
- Rig for the night: snubber (often 30–50 ft of nylon), chafe gear, anchor alarm with a realistic radius, and proper anchor light.
Anchoring Safety Fundamentals: Scope, Set, Swing
“Safe anchoring” means your anchor, rode, strong points, technique, and monitoring all agree with each other. If one piece is undersized or sloppy, the rest won’t save you when the wind clocks 90° at 0200. I’ve watched excellent anchors “fail” because the boat had 3:1 scope in gusty conditions, or because a cleat backing plate was basically a potato chip.
Get your terminology straight because it drives decisions. Rode is the chain and/or rope between boat and anchor; scope is rode length divided by vertical distance (depth plus bow roller height). Set is the anchor actually digging in and holding under load, and swing room is the space your boat needs to rotate around the anchor as wind and current change. Add catenary effect (the sag in chain that can soften light loads), plus yawing (sailing back and forth on the rode), and you’ve got the real-world mess that makes anchoring interesting.
Anchors drag for boring reasons that stack up fast. The classics are insufficient scope, a poor set (anchor never buried), or a bottom with low shear strength like soupy mud over hardpan, weed, or thin sand over rock. Then come the “secondary failures”: wind and current veering, chafe at chocks, a snubber that saws itself in half, or hardware that wasn’t installed to ABYC/ISO expectations. Chain also stops being your shock absorber when it’s blowing hard—once the rode straightens, catenary becomes a bedtime story you tell yourself to sleep.
Use a repeatable pre-anchor checklist so fatigue doesn’t make your decisions. Check gear (anchor pinned, windlass breaker on, snubber ready), check the chart and depth sounder, check tides and weather timing, and assign crew roles so no one free-hands chain near a moving gypsy. If you want to arrive with enough daylight for a second attempt, use a sea-distance tool to time your arrival window and build in 1–2 hours of margin before dark. Anchoring is not the moment to discover your “quick stop” is actually a night entry.
Calculate Anchor Scope Correctly (Depth + Tide + Bow Height)
Scope is simple math that gets complicated when people skip terms. The correct ratio is:
Scope = Rode length ÷ (water depth + bow roller height above water + tide rise expected)
That “bow roller height” is why two boats in the same anchorage can have radically different holding with the same rode length. On many cruising sailboats the roller is 3–6 ft above the waterline, and ignoring it can knock your scope down by a full ratio point in shallow water. If you anchor in 12 ft and your bow roller is 3 ft up, your vertical is 15 ft—not 12.
Scope Targets for Lunch, Overnight, and Heavy Weather
For a short lunch stop in settled conditions, 3:1–5:1 can work if the bottom is good and you’re actually watching the boat. For overnight, ~7:1 is a common all-around target because it keeps the pull angle low as wind builds and waves snatch the rode. For strong wind or squally forecasts, 8:1–10:1 is reasonable if you have room to swing and enough rode to deploy without bare-stocking the locker.
Scope isn’t just about wind speed; it’s about motion and shock. A steep chop in 20 knots can hit harder than flat water in 30, because the boat’s bow is lifting and falling and yanking the rode. If the forecast includes gusty gradients, frontal passages, or an inlet that reverses current, assume your anchor will get tested in more than one direction. When in doubt, spend rode, not adrenaline.
Worked Scope Examples You Can Copy Aboard
Example 1: 12 ft depth + 3 ft bow height = 15 ft vertical.
At 7:1, you need ~105 ft of rode (15 × 7).
At 5:1, you need ~75 ft of rode (15 × 5).
Those numbers are why “I put out 100 feet” is not a plan unless you’ve done the vertical math.
Example 2: You’re anchoring in 10 ft at low water with a 6 ft tide range. At high tide you’ll have 16 ft of water (10 + 6), before bow height. If you put out 50 ft of rode, you have 5:1 at low water (50/10), but only 3.1:1 at high water (50/16). Add a 4 ft bow roller height and the effective scope is worse again, which is how “fine at sunset” becomes “dragging at midnight.”
Tide Range Pitfalls: Scope Shrinks as Water Rises
The trap is calculating at the wrong reference time. The safer habit is to calculate scope using predicted high tide (or storm surge if that’s realistic), because scope only gets better as the water falls. If you’re arriving near low water and planning to stay overnight, assume your scope will shrink as the tide rises and pay out accordingly.
I keep a tiny “scope worksheet” in the logbook with three lines: now, high tide, and squall. Each line has depth, bow height, target ratio, and rode required. It takes 60 seconds and saves the kind of argument that starts with “I thought you said…” and ends with someone on deck in the rain.
Choose the Right Anchorage: Bottom, Exposure, and Drift Room
Charts and apps will show you where people anchor; they won’t tell you if it’s smart tonight. You want good holding, reasonable protection, and enough room to recover if you’re wrong. A classic error is anchoring close to a lee shore because the water looks flat, then learning the difference between “flat” and “safe” when the wind shifts after midnight.
Bottom Composition and Holding: Sand, Mud, Grass, Rock
Most anchors behave best in sand and firm mud because they can bury and develop real shear resistance. Modern scoop-style anchors (think Rocna/Mantus/Spade-style designs) tend to set quickly in sand/mud and tolerate load shifts better than older shapes, though nothing is magic. Plow anchors can reset well but may skate on hard sand or weed, and Danforth/fluke anchors can hold like a vise in clean sand yet foul or fail to penetrate weeds and rock.
Weed is the quiet villain because it gives you a false “set.” The anchor feels like it grabbed, but it’s wrapped in grass instead of buried in soil, and the first real gust strips it clean. If you see grass on the flukes when you retrieve, don’t rationalize it—move to a patch of sand, or be ready to reset with more scope and a harder set test. Some of the best anchoring grounds are sand over a hard bottom, like the coves of the Sea of Cortez in Baja California—they hold beautifully once set but can shrug off a lazy first attempt.
Wind Shifts and Current Reversals (When Anchors Unset)
In river mouths and inlets, current reversals can spin boats 180° in minutes. That’s when marginal sets and weed-fouled anchors reveal themselves, because the anchor has to reset from a new direction instead of just holding straight. Some bottoms also “skin over” with a thin firm layer above mush, so an anchor may set nicely in the skin and then plow in the soup under load changes.
Exposure matters as much as bottom. A 1-mile fetch can build enough chop to snatch the rode in 15–20 knots, while a steep-sided basin can funnel gusts far above the forecast. If you must anchor with exposure, increase scope toward 7:1 and rig a real snubber, because the loads come from jerks, not averages.
Route Planning for Anchoring: Distances, ETAs, and Plan B
Good anchoring starts hours earlier with arrival timing. Use a tool to calculate the distance between ports and your ETA so you enter the anchorage with 1–2 hours of daylight left for a second attempt or a move to Plan B. Darkness is when you make optimistic choices about depth, bottom, and how close that other boat “probably” is.
Also check that the depths you’ll be anchoring in match your available rode. If you only carry 150 ft total and the anchorage is 25 ft at high tide with a 5 ft bow roller height, your vertical is 30 ft, and 7:1 would require 210 ft. The best anchor in the world won’t help if you physically can’t deploy the scope your conditions demand.
How to Set an Anchor So It Holds: A Repeatable Protocol
Anchoring failures are often “process failures.” The anchor didn’t get a fair chance to orient, dig, and build resistance before someone snubbed the rode hard and rolled it over. A clean, repeatable protocol fixes most of that, and it’s teachable to crew who haven’t anchored your boat before.
Approach and Drop: Positioning, Communication, and “Lower, Don’t Throw”
Make the approach into the wind or current—whichever dominates—at dead slow speed. Brief the crew: one person on the helm, one on the windlass/rode, and one as lookout in crowded spots. If you’re using a windlass, keep hands and feet clear and never try to “help” chain into the locker while it’s running; I’ve seen that movie and I don’t recommend it.
Lower the anchor until it hits bottom; don’t launch it like you’re auditioning for the Olympics. Dropping a heap of chain on top of the anchor can prevent it from aligning and biting, especially in weed or firm sand. The goal is a straight lead and a controlled laydown so the anchor can start working immediately.
Paying Out Rode: The Controlled Drift-Back Method
Once the anchor is on the bottom, let the boat drift back slowly while you ease out rode. I like a brief pause around ~3:1 scope so the anchor can orient and start digging before you commit to full scope. That pause is especially helpful in mixed bottoms where you want to feel the anchor transition from “touching” to “biting.”
After the pause, pay out to your target scope—5:1 for a calm lunch stop, ~7:1 for overnight, or 8:1–10:1 if strong wind is expected and there’s room. When you reach target scope, snub the rode gently to start loading the anchor, then rig your snubber before you do a full power set. Chain straight to a cleat is loud, jerky, and hard on gear.
Set Verification Under Power (RPM/Time) and Confirmation Methods
A proper set test is not optional if you plan to sleep. Back down at roughly 1,200–2,000 RPM for 30–60 seconds, then briefly increase to confirm you’re not creeping. The exact RPM depends on your engine and prop, but the point is to create a steady, meaningful load that approximates real wind forces.
Confirm the set with at least two methods. Use shore ranges (two fixed objects lined up) so you can see movement instantly, and also glance at the GPS track on the plotter to confirm you’re not leaving a slow “comet tail.” When the anchor is set, you’ll often feel the bow stop “hunting” forward and settle into a steady yaw pattern instead of marching downwind.
Reset Protocol if the Anchor Won’t Bite
If you’re skating during the set test, abort early. Don’t keep powering back and hope the anchor will eventually feel guilty and dig in. Retrieve, clear mud or weed from the flukes, move upwind, and redeploy with more scope or a better patch of bottom.
My reset sequence is simple: up, clean, reposition, down, pause at 3:1, then full scope and re-test at 1,200–2,000 RPM for 30–60 seconds. If it fails twice in the same spot, stop blaming the anchor and start blaming the bottom—or your choice of anchorage. The ocean is not obligated to provide good holding where it’s convenient.
Swing Room Math in Crowded Harbors (and Collision Avoidance)
Crowded anchorages aren’t dangerous because boats are close; they’re dangerous because boats swing differently. Your job is to understand your swing geometry, estimate everyone else’s, and decide whether the night will be boring. If you can’t make it boring, move.
Swing Radius and Swing Circle Area: Quick Calculations
A fast approximation works well enough for real decisions:
Swing radius ≈ rode paid out + boat length (LOA).
If you deploy 120 ft of rode with a 36 ft sailboat, your radius is about 156 ft. That’s your center-to-farthest-bow distance, not counting yawing. If you want perspective, the swing circle area is πr², so for r = 156 ft that’s roughly 76,400 sq ft, or about 1.75 acres. That’s a lot of “personal space” you’re asking for in a popular harbor.
Add buffers for reality. Consumer GPS accuracy is often 3–10 m (about 10–33 ft) under good sky view, and boats don’t swing in perfect circles. Gusts can shove you downwind, and some hulls will sail around their anchor like they’re bored.
Different Boats Swing Differently: Monohull vs Cat, Chain vs Rope
A light monohull with a tall rig can yaw hard, especially in light air with chop. Catamarans often yaw less but have more windage and can “park” differently in mixed wind/current. Boats on all-chain rodes may sit a bit closer to the anchor in lighter conditions, while rope/chain boats can fall back more as nylon stretches and lifts.
Current changes complicate everything because the pull direction can reverse while the wind remains steady. In some inlets you’ll watch boats point one way under current and another under wind, creating offset swing patterns that aren’t intuitive. That’s how you end up “fine” on paper and too close at 0300.
Crowded Anchorage Tactics: Where to Drop and When to Re-anchor
In tight quarters, drop where you want the boat to end up after paying out scope, not where you want to start. That means you often begin upwind of your final resting spot by the length of rode you’ll deploy. Watch how the boats already anchored are lying; if they’re all on current, anchoring “on wind” may put you across the grain.
Before you commit, compare your estimated radius with your neighbors’ likely radii, and assume at least one of you miscalculated. If the forecast includes a wind shift or a current reversal, assume boats may “swap sides” around their anchors. If the geometry is ugly, re-anchor early while it’s still civil—using voyage distance to estimate fuel burn before relocating can keep that decision rational instead of emotional.
Rode, Chain, Snubbers, and Chafe: Technical Setup That Prevents Dragging
Good technique can’t compensate for a rode that’s too short, chain that doesn’t match the windlass, or chafe points that cut you loose quietly. The best anchoring systems I’ve used are boring: sized properly, protected from chafe, and easy to deploy without drama.
All-Chain vs Rope/Chain: Handling, Weight, and Abrasion
All-chain rodes resist abrasion and tolerate coral, rock, and rough bottoms better than nylon alone. They also reduce the “sawing” chafe you get when the boat yaws, because chain handles edge contact better than rope. The downside is weight forward: 1/4 in G4 chain weighs around 0.74 lb/ft, while 5/16 in G4 is around 1.1 lb/ft (manufacturer values vary), and a few hundred feet adds up fast.
Rope/chain hybrids are common because they’re lighter and give stretch, but they demand chafe management. Many cruisers carry 150–300 ft of total rode for coastal flexibility, often with 30–60 ft of chain plus nylon. If you regularly anchor deep or need 8:1–10:1, you’ll discover quickly whether your rode length matches your ambitions.
Chain Size and Windlass Compatibility (Don’t Guess the Gypsy)
For 30–40 ft cruising sailboats, 1/4 in or 5/16 in high-test (G4) chain is typical. The critical detail is compatibility: the chain must match the windlass gypsy and often the bow roller geometry. A gypsy that’s “close enough” will skip, jam, or chew chain under load, usually when you’re tired, in current, and trying to look competent.
Costs are real and worth planning for. G4 chain often runs about $3.50–$7/ft for 1/4 in, and $5–$10/ft for 5/16 in, so upgrading 200 ft can be a $700–$2,000 decision before fittings. A windlass in the 700–1,200 W range commonly costs $900–$3,500, so it pays to measure twice before buying chain that doesn’t fit.
Snubber and Bridle Setup: Shock Loads, Noise, and Chafe Control
A snubber is not optional on chain if you care about sleep or hardware. Nylon elongation can be about 15–20% at working loads, which is exactly what you want when the bow pitches. Typical snubber line is 3/8 in to 5/8 in nylon, with 1/2 in common on 30–40 ft boats, and a length around 30–50 ft so it can stretch gradually rather than snatch.
Use a proper chain hook or grabber (often $20–$80) and transfer the load off the windlass. Add chafe protection anywhere the snubber touches a chock, toe rail, or roller, because that’s where lines quietly die. If you’re on a sloop that yaws aggressively, a V-bridle to port and starboard cleats can reduce yaw and share loads, assuming the cleats are properly backed and installed.
Optional Tools: Kellet/Sentinel Weight and Anchor Alarms
A kellet (sentinel) can help in light air by keeping the pull angle lower and damping yaw. A common setup is a 10–30 lb weight lowered 10–30 ft down the rode, but don’t expect miracles in 25–35 knots when the rode is bar-tight and straight. In strong wind, your money is better spent on scope, snubber, and a good set.
Anchor alarms are useful if you set them realistically. With GPS accuracy often 3–10 m (about 10–33 ft), you must build in error plus swing. A good starting radius is (rode paid out + LOA) + 10–50 ft, adjusted for conditions and how confident you are in your set. Apps can be $0–$60, while dedicated units can run $150–$400, but the best alarm is still a well-set anchor and a crew that looks outside occasionally.
Common Anchoring Mistakes (and the Exact Fix for Each)
Dragging stories usually start with a small compromise that turned into a big one. The fixes are rarely exotic—just measurable corrections applied consistently. If you want fewer surprises, be honest about scope, set testing, and what the bottom is actually doing.
Scope and Tide Errors That Quietly Reduce Holding
Mistake: calculating scope using charted depth only. Fix: recalc using depth + bow roller height (often 3–6 ft) + predicted high tide, then pick your ratio. If you intended 5:1 and your tide range is 6 ft, remember the classic failure: 50 ft of rode can go from 5:1 at 10 ft to 3.1:1 at 16 ft without you changing anything.
Mistake: using lunch-stop scope for overnight. Fix: move from 3:1–5:1 to ~7:1 when you plan to sleep, and toward 8:1–10:1 when strong wind is expected and room allows. If you don’t have enough rode for that, you don’t have enough rode—no amount of optimism changes the math.
Set and Technique Failures: The Anchor Never Dug In
Mistake: dumping chain in a pile on top of the anchor. Fix: lower to bottom, then feed rode as the boat drifts back so the anchor can align and dig. Use the pause around ~3:1 to let it start biting before you load it up.
Mistake: never doing a real set test. Fix: back down 1,200–2,000 RPM for 30–60 seconds, then briefly increase to confirm no movement. Verify with two shore ranges and/or a plotter track, and don’t accept “it feels okay” as evidence when you can measure it.
Hardware, Chafe, and Monitoring Gaps That Become Emergencies
Mistake: snubber too short or no chafe gear. Fix: rig 30–50 ft of nylon snubber (often 3/8–5/8 in) with proper chafe protection at every contact point. Transfer load off the windlass, because windlasses are for lifting, not anchoring loads.
Mistake: anchor alarm set to the exact calculated radius. Fix: include GPS error (10–33 ft) plus yawing and conditions; add 10–50 ft buffer, more if gusty or crowded. And reset the alarm every time you re-anchor, because the alarm doesn’t know you moved—only your crew does.
Regulations and Standards: USCG Rules, ABYC/ISO, and Inspection Checks
Anchoring is seamanship, but it’s also compliance and engineering. If your anchor light is off, you’re not just rude—you’re hard to see and wrong under the rules. If your cleats are under-backed, you’re betting your boat on a few bolts and good luck.
USCG Navigation Rules at Anchor: Light and Day Shape
In U.S. waters, the Navigation Rules (COLREGS/72 as adopted; 33 CFR 83) require an all-round white anchor light at night, placed where it can best be seen. The day shape for a vessel at anchor is a black ball, which many recreational boats ignore until someone big comes around the corner and wishes you hadn’t. In crowded anchorages, proper lighting isn’t etiquette—it’s collision avoidance.
If you anchor near channels or traffic lanes, visibility matters more than your feelings about “light pollution.” A good anchor light also helps your neighbors judge your position and swing, especially in rain or haze. And yes, your nice warm cabin is less important than being seen by the late-arriving sportfisherman doing 15 knots on instruments.
ABYC H-40 / ISO Strong Points: Why Cleats and Chocks Matter
ABYC H-40 and ISO 4566 address expectations for strong points—cleats, chocks, bow rollers, and their load paths. The practical takeaway is simple: anchoring loads can be high and dynamic, so hardware needs proper backing plates, sound deck core, and fasteners that aren’t corroded or working loose. If your cleat flexes under hand load, it’s not ready for a night of snatching.
Do a basic inspection: look for cracks around cleat bases, water intrusion, and undersized washers masquerading as backing plates. Check that chocks and rollers don’t create sharp bends that concentrate chafe. If you plan to use 8:1–10:1 in strong wind, you’re explicitly planning for high loads—your strong points should be treated like safety equipment, not decoration.
Windlass and Electrical Safety Notes (ISO 15084 / ABYC E-11)
Windlasses fall under ISO 15084 guidance for performance and safe operation, and the real-world safety point is chain compatibility and secure mounting. A windlass that’s under-bolted or misaligned can fail when you most need it, and a gypsy mismatch can turn retrieval into a jammed, dangerous mess at the bow. If you’ve ever had chain leap the gypsy under load, you already know the feeling.
On electrical systems, ABYC E-11 is the reference for circuit protection and conductor sizing, which matters because windlasses draw serious current. If your windlass wiring is undersized or poorly protected, it’s not just unreliable—it’s a fire risk. Inspect the breaker, cabling, foot switches, and any wireless remote setup, and fix it before “anchor up” becomes “smoke show.”
FAQ: Real-World Anchoring Questions Sailors Actually Ask
For a rope/chain rode, how does adding 30–60 ft of chain change required scope and holding compared to all-nylon in 20–40 kt winds?
Adding 30–60 ft of chain improves abrasion resistance at the seabed and helps keep the pull angle lower in lighter air and chop. In 20–40 knots, don’t assume chain “replaces” scope, because the rode often straightens and catenary largely disappears under sustained load. Treat chain as durability and handling insurance; treat 7:1 to 10:1 scope and a proper set as what actually keeps you off the rocks.
How do I set an anchor alarm radius when my swing radius is 156 ft and GPS accuracy is only 3–10 m—what buffer is technically justified?
Start with 156 ft, then add GPS error (10–33 ft) plus a behavior buffer for yawing and gusts. In settled conditions, +20–30 ft is reasonable; in gusty or crowded conditions, +40–50 ft is more defensible. The goal is fewer false alarms without ignoring real dragging, so tune it after you watch one full swing cycle.
What is the correct snubber geometry (V-bridle vs single) to reduce yawing on a sloop with 1/4 in G4 chain and a 36 ft LOA?
For a yaw-happy sloop, a V-bridle from port and starboard bow cleats to a chain hook often reduces sailing-at-anchor and shares load. Use nylon around 1/2 in diameter for a 36 ft boat in typical conditions, with 30–50 ft length and robust chafe gear at chocks. A single snubber is simpler and works fine, but it can encourage more yaw if the lead is off-center.
How do current reversals in an inlet affect anchor reset behavior for scoop vs plow vs Danforth designs, and what re-setting test should I run after the reversal?
Current reversals can pull the anchor out of its groove and require it to reorient and re-bury from the opposite direction. Scoop anchors often re-set well in sand/mud if they were deeply buried, plows may reset but can skate on harder bottoms, and Danforth/flukes can hold impressively but may foul or fail to penetrate in weeds or shifting layers. After a reversal (or if you suspect one overnight), re-check ranges/GPS, and if concerned, run a controlled set test again—1,200–2,000 RPM for 30–60 seconds—once you’re sure you have clearance.
How can I verify my bow cleats, chocks, and backing plates meet ABYC H-40/ISO strong-point expectations before relying on 8:1–10:1 storm scope?
Inspect from belowdecks: you want substantial backing plates (not just small washers), no core compression, no moisture damage, and fasteners free of corrosion. Check for deck cracking around hardware, movement under load, and fair leads that won’t saw through a snubber. If anything flexes, creaks, or leaks, fix it before you plan storm tactics—ABYC H-40 and ISO 4566 are the right references, but your eyes and a wrench will catch most real problems.
Conclusion: A Practical Anchoring Workflow That Prevents Dragging
If you want your anchor to hold, make anchoring a repeatable routine. Choose a spot with holding-friendly bottom and enough drift room, calculate scope using depth + tide + bow height, then set and verify under power before you relax. Confirm swing clearance with quick math, rig a proper snubber with chafe protection, and monitor with ranges plus an anchor alarm set with realistic buffers.
Finally, don’t skip the unglamorous stuff: compliant USCG anchor lighting and strong points that meet the spirit of ABYC H-40 / ISO guidance. The goal isn’t to anchor like a hero—it’s to anchor so nothing interesting happens while you sleep.
About the Author
Related Articles

Sailing Greece Itinerary: Cyclades & Saronic (7–14d)
Plan the perfect sailing Greece itinerary with 7–14 day routes through the Cyclades & Saronic. Get the day-by-day plan and start booking now.
By Breezada Team

Best Yacht Charter Destinations by Month Guide
Plan the perfect trip with the best yacht charter destinations by month. Find where to go each season and start booking your charter today.
By Breezada Team

Mediterranean Marina Fees 2026: Italy, Greece & Croatia
Compare Mediterranean marina fees 2026 for Italy, Greece and Croatia. Plan your route and budget—read the latest guide now.
By Breezada Team

Croatia Sailing Itinerary: Split to Dubrovnik (7 Days)
Follow this 7-day Croatia sailing itinerary from Split to Dubrovnik—route, stops, tips, and map. Plan your trip and start sailing today!
By Breezada Team