
How to Reef a Sail: Slab vs Single-Line Systems
Reefing isn’t about going slower. It’s about keeping the boat on her feet, the rudder light, and the rig out of the repair shop. If you’re searching how to reef a sail, the real answer is: reef early, reef cleanly, and use a system that actually seats the tack and clew under load.

Photo by Kristel Hayes on Unsplash
Reefing fundamentals: what changes and why it works
Reefing a mainsail is simply reducing sail area so the boat makes the same miles with less drama. Less area lowers the heeling moment, reduces weather helm, and cuts rig and sail loads—especially the flogging loads that eat stitching and leech lines. Most cruising boats carry 3 reef points, and a common pattern is about 10–15% area reduction for the first reef, 20–30% for the second, and 35–45% for the third (your sailmaker’s geometry may vary).
Reefing points on a mainsail are built around two real load-bearing corners. The mainsail luff cringle is the reef tack (near the mast), and the leech cringle is the reef clew (near the boom end). Between them you’ll often see reef nettles/ties—those are just to bundle the bunt, not to carry load. If you crank the ties tight, you’re loading sailcloth and stitching that were never meant to be a structural member, which is a great way to buy a sail repair you didn’t budget for.
The reef’s geometry matters more than most people admit. The new clew must be pulled down and aft so you preserve foot tension (outhaul effect) and keep leech tension controllable (twist control). That “down + aft vector” is why reefing lines that only pull aft tend to leave a round, drafty foot and a leech that won’t behave. It’s also why you’ll hear old skippers muttering about “getting the clew on the boom,” not hovering above it.
The tradeoff between systems is straightforward: cockpit convenience versus independent control and friction management. Slab (jiffy) reefing uses separate controls for tack and clew, so you can seat the tack hard, then tension the clew properly. Single-line reefing does both with one line, which is tidy from the cockpit—but can turn into a winch-and-pray exercise if friction stacks up across 4–7 direction changes.
Tip box (print this):
Reef loads belong on the reef tack and reef clew cringles. Reef ties only gather cloth. If your sail looks “reefed” but the tack is 20 mm high, it’s not reefed—it’s just smaller and angrier.
When to reef a mainsail: wind, heel, sea state, and course
True vs apparent wind: why your instruments can mislead
A lot of reefing arguments start with the wrong wind number. Your masthead instrument usually shows apparent wind, which rises as the boat speeds up and swings forward on a reach. That’s why you can see 22 knots on the display while the true wind is closer to 16, and your buddy insists you’re “overpowered.” On a close reach, apparent wind can easily run 5–10 kt higher than true, especially in flat water when the boat accelerates.
For decisions, I use true wind if I have it (or a good mental correction), and I reef for the trend and gust spread. If sustained is 16–18 kt true and gusts are hitting +5–10 kt, that’s already “first reef territory” in squalls or chop. If it’s building sea state, you’ll want the reef in before the boat starts hobby-horsing and the main begins snapping like a flag.

Photo by Markos Mant on Unsplash
A practical decision framework: heel angle, rudder load, and crew capacity
Here are solid coastal-cruising rules of thumb in true wind: full main up to 12–15 kt, first reef around 15–18 kt, second reef around 20–25 kt, and third reef around 28–35+ kt. Those numbers shift with boat type, mainsail roach, and how much you enjoy spilling coffee into your lap. But they’re a reliable starting point when you’re trying to stay ahead of conditions rather than react to them.
Heel angle is the skipper’s free sensor, and it doesn’t lie. On many monohull cruisers, reef when heel is consistently 20–25°, and aim to sail around 15–20° for comfort and efficiency. If you’re sailing at 25° with the rudder loaded up and the boat constantly rounding in gusts, you’re not “powered up,” you’re just wasting energy as drag and rudder angle.
Course matters because apparent wind and sail loading change drastically. Close-hauled in waves, you’ll often reef earlier than the wind number suggests because the rig is shock-loaded every time the bow falls off a wave. On a reach, apparent wind climbs and the main loads up; on a run, the main can feel docile until a roll turns into an accidental gybe. Add nightfall, traffic, or limited sea room and the correct call is almost always “reef now,” consistent with the spirit of COLREGs Rule 6 (Safe Speed)—control matters more than bragging rights.
When you’re planning longer legs, reefing isn’t isolated from navigation. If you’re routing to avoid head seas or time a weather window, calculate the distance between ports to estimate miles, time, and what conditions you’ll likely meet along each course. I’ve used it more than once to decide whether it’s worth cracking off 10–15° to flatten waves and keep a first reef instead of beating the boat to death.
| Condition cue | What you feel/see | Practical action |
|---|---|---|
| Sustained true wind 15–18 kt | Heel rising toward 20°, gusts +5 kt | Put in 1st reef before it’s urgent |
| Sustained true wind 20–25 kt | Rudder heavy, rounds up in gusts | 2nd reef, flatten main, reduce twist |
| True wind 28–35+ kt / squalls | Control becoming intermittent | 3rd reef early; consider headsail reduction too |
| Building chop / short seas | Slamming, mainsail snapping on luff | Reef one step earlier than wind chart |
| Nightfall / traffic / tight sea room | Less margin for errors | Reef early; keep cockpit workload low |
Slab (jiffy) reefing step-by-step: mast work and cockpit-led two-line
Pre-reef setup: heading, traveler, and depowering sequence
A clean slab reef starts before you touch the halyard. Pick a stable point of sail: close reach or luffing gently with speed on is usually better than pinching up and stalling. Brief the crew, clip in if you’re leaving the cockpit, and get the boat settled so you can do the job in 45–120 seconds instead of five minutes of flogging.
Depower first to protect gear and hands. Ease the mainsheet and ease the vang substantially so the leech opens and the boom can rise a bit as you lower the sail. If the vang is on hard, you’ll fight leech tension the whole time and your reef line will feel like it’s tied to a truck. Drop the traveler as needed so the boom isn’t trying to take your head off while you’re concentrating.

Photo by Karla Car on Unsplash
Setting the reef: tack down first, then clew (and why)
On a slab reefing system, seat the tack first. Ease the halyard until the reef tack cringle is reachable, then hook it on a tack horn or pull it down with a tack downhaul/tack strap. Typical luff drops on mid-size cruisers are roughly 0.8–1.3 m (32–52 in) for the first reef, 1.6–2.6 m (63–102 in) for the second, and 2.4–3.8 m (94–150 in) for the third—so mark your halyard if you like repeatability.
Once the tack is down and secure, tension the clew with the reefing pennant through the boom reefing block at the boom end. You want that clew pulled down + aft until the new foot is reasonably tight and the leech isn’t falling off to leeward like a wet flag. If you tension the clew first, the sail tends to pull diagonally and the tack floats, which makes the luff look “sort of okay” until the first gust makes everything shift.
Reef ties come last and stay light. Use nettles to gather the bunt so it doesn’t snag on winches, gooseneck fittings, or lazy jacks. Tie them with a reef knot or slip-knot, snug enough to tidy, not enough to carry load. If the ties are bar-tight, something else isn’t right.
Re-tension for shape: halyard, outhaul, vang, and sheet
After tack and clew are set, re-tension the halyard to restore luff tension and keep draft forward. Then adjust outhaul (if separate from the reef clew) to flatten the reefed foot. Finally, bring the mainsheet and vang back on to restore twist control—vang especially matters off the wind, because it keeps the boom from lifting and dumping leech tension.
Lazy jacks and stack packs help control the drop, but they can also snag batten ends and hold the luff up. Keep lazy jacks snug but not guitar-string tight, and watch for battens catching on jack legs as the sail comes down. If you consistently snag, add chafe patches where the sail rubs and consider re-leading the jack legs so the forward legs are slightly wider at the mast.
Breezada’s sea distance calculator can also help with a very practical reefing question: “How long will we be in this breeze?” If you want to check the nautical miles for your planned route and you’ve got 28 miles to the next inlet and the breeze is building, the faster, tidier slab reef now often beats wrestling a half-set reef for the next three hours.
Single-line reefing: cockpit workflow, tuning, and common failure points
How single-line reefing routes the load (and why friction matters)
A single-line reefing system pulls the reef tack and reef clew with one line, usually running from the cockpit to the boom, forward to the gooseneck, up to the tack cringle, back through the boom, up to the clew cringle, then back down to the boom and forward again. That convenience comes with friction: it’s common to see 4–7 direction changes between cockpit and sail. Each turn asks the line to slide under load, often at bad angles, through blocks that may not be sized for the job.
If you’ve ever had to winch like you’re grinding in a genoa on a breezy beat, that’s friction talking. In calm water, single-line can match slab reefing time. In lumpy water, when the boom is moving and the sail is loading and unloading, the system can refuse to fully seat the tack or clew without heroic winching—and that’s exactly when you want the reef to be boring.
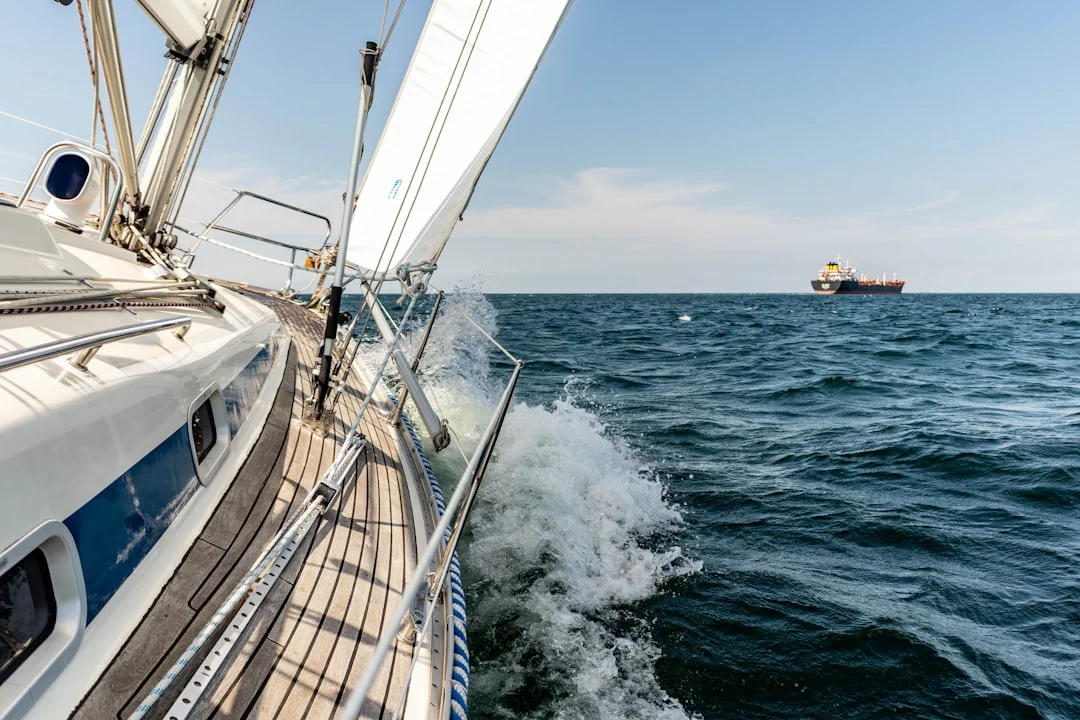
Photo by Michael Held on Unsplash
Cockpit-led procedure: the “controlled ease, then tension” method
The sequence is similar to slab reefing, but you must be disciplined about depowering. Head to a steady close reach, ease mainsheet and vang substantially, and ease the halyard under control until the reef cringles are near position. Then haul the single reef line steadily—hand first, then winch only as needed—watching both the tack and the clew.
Once the reef line is mostly in, re-tension the halyard to proper luff tension. Then finish reef-line tension to bring the clew down and aft, and finally reapply vang and sheet to reestablish twist control. If you grind the reef line to death before the halyard is back up, you often create weird diagonal loads that jam the line at the clew cringle.
Fixes for a tack that won’t come down: routing, hardware, and tack downhauls
The most common single-line failure is the tack hovering 10–30 mm above the gooseneck. That gap seems small until you notice the luff scallops, draft aft, and the reef line sawing on the cringle because the tack never seated. The causes are predictable: too much friction forward (gooseneck blocks, internal boom sheaves), poor lead angle into the tack cringle, or a system that simply doesn’t provide enough vertical component at the luff.
The first fix is friction and geometry. Upgrade high-friction parts to ball-bearing or roller-bearing blocks, make sure sheaves are smooth and properly sized (often 40–60 mm for 8–10 mm line), and reduce sharp turning angles where possible. Add chafe sleeves at the clew cringle and inspect for heat glazing—single-line systems can generate surprising heat when you winch hard.
If the tack still won’t seat, add a dedicated tack downhaul/tack strap. It’s a simple, separate line whose only job is to pull the tack straight down, guaranteeing the vertical pull that single-line systems sometimes can’t deliver. It turns a finicky one-line system into a reliable hybrid: one line for the clew, one small line for tack seating, and suddenly your “cockpit reefing” actually looks like a reef.
Single-line vs slab reefing: sail shape, loads, reliability, and safety
Sail shape and pointing: independent tack/clew control vs coupled tension
Slab reefing usually wins on sail shape because you can tension tack and clew independently. You seat the tack hard, then apply the right down-and-aft force at the clew, then fine-tune halyard tension. That sequence tends to produce a flatter reefed sail with draft forward, which reduces heel and weather helm and helps pointing—especially in the 20–25 kt true-wind range where a boat can be overpowered but still making miles to windward.
Single-line systems can match that shape, but only when friction is low and the routing gives a proper clew vector. If friction is high, you often get a “choice” you didn’t want: either the tack is down and the clew is loose (round foot, open leech), or the clew is tight and the tack floats (luff scallops, draft aft). That coupled tension is the core compromise.

Photo by Evan Smogor on Unsplash
Failure modes and heavy-weather reliability: what breaks first
In heavier weather, reliability is worth more than elegance. Slab reefing has fewer hidden friction points, and it’s easier to diagnose because each control does one job. Single-line reefing has more moving parts, more turning points, and more places for chafe: cringles, boom exit slots, gooseneck blocks, and deck organizers. When things go wrong at 28–35+ kt, they go wrong fast, usually while you’re busy being “athletic” in a cockpit that’s trying to throw you out.
From a standards-minded viewpoint, ABYC H-41 is a good framing for how you should think about reefing hardware: inspect, maintain, and select components suitable for rigging system integrity. It doesn’t dictate your reefing style, but it supports the larger point—reefing is a load-bearing operation, and your blocks, clutches, and attachment points should be sized and installed like they matter, because they do.
My practical recommendations are boring on purpose. Day sailing with a competent crew: single-line can be fine if tuned well. Shorthanded cruising: cockpit-led two-line slab reefing is hard to beat. Offshore: I want systems that seat tack and clew every time, even when I’m tired, wet, and not interested in a foredeck project.
Tip box:
The safest reef is the one you can set cleanly before you need it. If the boat is rounding up, you waited too long.
Hardware and line sizing: diameters, lengths, blocks, and cockpit leads
Line diameter and material: stretch, clutch compatibility, and hand feel
For 30–45 ft cruisers, reefing lines are typically 8–10 mm (5/16–3/8 in) low-stretch double braid. Polyester double braid is durable and cost-effective; polyester with a Dyneema/Spectra core reduces creep and keeps the clew where you put it after a few hours of load. Don’t oversize line “for strength” if it won’t run cleanly through clutches and organizers—handling and compatibility matter as much as break strength.
Clutch compatibility is where many home refits go wrong. A rope clutch sized for 8–10 mm line will slip or glaze a smaller line, and it will chew a larger line. Look for jaw wear, slipping under load, and flattened spots; glazing is the shiny “melted” look that tells you friction and heat are winning.
Photo by Jeremy Bishop on Unsplash
Line length planning: a quick method that prevents coming up short
Reef line length planning is simple if you stop guessing. A good rule is 2.0–3.5× boom length depending on routing complexity and cockpit leads. For a 4.0 m boom, that’s typically 10–14 m (33–46 ft) of line per reef. If you lead to the cockpit through organizers and clutches, lean toward the longer end so you’re not tying desperate knots at sea.
My quick method: measure the path in segments and add a safety margin. Boom end to clew and back, forward inside/outside the boom, up to tack and back, then from gooseneck to cockpit, plus 0.5–1.0 m tail for winch handling. If your single-line system has 4–7 turning points, add extra because every block and fairlead eats a little working length once knots and splices are accounted for.
Breezada’s sea distance calculator can help here too: if you know your longest typical leg and expected breeze, you can decide if “cockpit-led everything” is worth the extra line, organizers, and clutter. It also helps when you want to estimate your fuel needs based on the voyage distance for legs where you expect to motor-sail under a reefed main.
Blocks, organizers, and clutches: selecting for load and friction
Block sizing matters for friction and heat. For 8–10 mm line, 40–60 mm sheaves are common, and larger sheaves generally reduce friction and line wear—within manufacturer recommendations. For mid-size cruisers, hardware often falls in the 600–1,200 kg (1,300–2,650 lb) SWL class for reefing controls, but you should select based on maker ratings and your actual loads, not dock talk.
If you’re building a cockpit-led system, minimize direction changes and side loads. Deck organizers should line up with clutches and winches so the line doesn’t enter at an angle that saws cheeks and grooves sheaves. Assign winches so you’re not cross-loading: halyard on one, reef lines on the other, with a consistent layout you can run in the dark.
| Upgrade step | What you change | What it fixes | Typical cost range (USD) |
|---|---|---|---|
| Basic slab reefing | Tack hook + clew pennant at boom | Simple, low friction, good sail shape | $0–$300 (often already installed) |
| Cockpit-led two-line slab | Add organizers/clutches, lead tack and clew separately | Less deck work, still independent control | $400–$1,500 per reef (hardware+line) |
| Optimized single-line | High-quality blocks, fair leads, good geometry | Cockpit convenience with reduced friction | $500–$2,000 per reef depending on rerouting |
| Hybrid single-line + tack downhaul | Add dedicated tack downhaul/strap | Fixes tack not seating, improves shape | $50–$250 add-on |
Cost, installation, inspection, and standards-minded safety checks
Deck hardware mounting and leak prevention (cockpit-led systems)
Cockpit-led reefing adds deck hardware, and every fastener is an invitation for leaks if you rush it. Use proper backing plates, correct fasteners, and bedding compound appropriate for the deck laminate. Align leads to reduce side-loading on organizers and clutches, because misalignment increases friction and accelerates cheek and sheave wear.
ABYC H-41 (rigging integrity framing) and ABYC H-40 (strong points/mounting practices) are useful references for the mindset: hardware should be mounted like it’s going to see real load, because it will. If you’re drilling the coachroof for organizers, be disciplined about sealing cores and preventing water intrusion. Nothing ruins the satisfaction of “new reefing” like discovering a soft deck around your clutch bank next season.
Inspection intervals and wear indicators: lines, cringles, blocks, clutches
Reefing gear fails slowly—until it doesn’t. Inspect lines for glazing and flat spots where they sit in clutches, and look for UV fuzzing on exposed tails. Check blocks for cracking cheeks, sheaves with sharp edges or grooves, and bearings that feel gritty under hand rotation. At the sail, inspect cringles and reef patches for elongation, stitching abrasion, and chafe where the line enters the leech cringle at an angle.
Here’s a realistic cost snapshot. Prices vary by boat size and whether you’re reusing existing hardware, but the ranges below are honest enough for planning.
| Item / service | Typical cost (USD) | Notes (what’s included) |
|---|---|---|
| Single-line reefing hardware kit (per reef) | $150–$600 | Boom-end fittings, fairleads, some blocks; varies widely |
| Rope clutch (single) | $90–$220 | Match line size (often 8–10 mm) |
| Deck organizer (2–6 sheaves) | $120–$450 | More sheaves = more routing options (and potential friction) |
| Blocks (ball/roller bearing, 40–60 mm class) | $35–$160 each | Higher quality reduces friction with 4–7 turns |
| Cheek blocks / fixed leads | $25–$110 each | Great for cleaning up lead angles |
| Reef line (polyester double braid) | $0.80–$2.50/ft | Budget-friendly; more creep than Dyneema-core |
| Reef line (Dyneema-cored) | $1.50–$4.50/ft | Lower stretch/creep; costs more but holds shape |
| Sailmaker add reef point (per reef) | $250–$700 | Tack+clew cringles, patching, nettles; not rigging |
| Lazy jacks retrofit | $150–$600 | Helps contain the drop; can increase chafe/snags |
| Stack pack / lazy bag | $900–$2,800 | Convenience upgrade; adds windage and maintenance |
Before heavy weather, do a “reef readiness” drill at the dock. Mark halyard and reef lines for each reef, run the system end-to-end, and confirm the tack seats fully every time. If you can’t set a reef neatly when you’re warm and calm, you won’t do it better when it’s 25 kt and raining sideways.
Frequently Asked Questions
In single-line reefing, how do you confirm the reef tack is fully seated at the gooseneck, and what routing or tack-downhaul changes fix a persistent 10–30 mm gap?
Confirm visually: the luff (reef tack) cringle should be hard down on the tack horn/reef hook or tight to the gooseneck with no daylight, not hovering 10–30 mm up. If it won’t seat, first reduce friction and improve geometry (upgrade gooseneck/boom blocks, fix lead angle into the tack cringle, and avoid sharp turns). If it still floats, add a dedicated tack downhaul/tack strap so you get a guaranteed vertical pull independent of the clew tension.
What reef line length should you order for a 4.0 m boom with cockpit-led routing, and how do you calculate it when the line passes through 4–7 turning points?
For a 4.0 m boom, order roughly 10–14 m (33–46 ft) per reef as a practical range, leaning longer for cockpit-led systems. Use the 2.0–3.5× boom length rule, then add measured cockpit distance and 0.5–1.0 m of tail. With 4–7 turning points, add margin for knots/splices and the fact that some routing “consumes” working length once everything is tensioned.
For 8–10 mm reef lines on a 30–40 ft cruiser, what sheave diameter range (e.g., 40–60 mm) minimizes friction and heat buildup at the reef clew cringle?
A 40–60 mm sheave range is common and works well for 8–10 mm line when the blocks are quality and aligned. Bigger sheaves generally reduce friction and heat, especially at the reef clew where loads are high and angles can be poor. Match manufacturer recommendations for line diameter, and prioritize smooth bearings and fair lead angles to stop chafe at the leech cringle.
What’s the correct control sequence (halyard, reef line, outhaul, vang, mainsheet/traveler) to avoid over-tensioning the leech and damaging the reef clew patch?
Depower first: ease mainsheet and traveler as needed, then ease the vang substantially to unload the leech. Ease the halyard under control to the reef mark, then tension the reef line to set tack/clew (tack first on slab; monitor both on single-line). Re-tension halyard, then fine-tune reef line/outhaul, and only then bring vang and sheet back on to restore twist control without grinding the clew patch to death.
How do lazy jacks/stack packs change the risk of batten-end snagging during reefing, and what adjustments reduce chafe at the luff and leech reef cringles?
Lazy jacks and stack packs contain the sail, which reduces cockpit chaos, but they can snag batten ends as the sail drops—especially if the jack legs are too tight or too close to the mast. Ease or re-lead jack legs to widen the forward opening, and keep the sail dropping cleanly along the mast. Add chafe protection at common hot spots: around the luff and leech cringles, and anywhere the sail rubs jack lines when reefed and loaded.
Captain’s wrap-up: My reefing decision rule is wind + heel + rudder feel. If true wind is trending into 15–18 kt, heel is living above 20°, or the helm loads up and the boat starts rounding in gusts, it’s time. Slab reefing gives the best independent tack/clew control; single-line reefing keeps you in the cockpit but must be tuned to beat friction.
Reef readiness checklist: pre-rig and coil reef lines, mark halyard/reef lines, inspect cringles/blocks/clutches for chafe and glazing, practice the sequence, and reef early so the boat stays balanced—and surprisingly fast.
About the Author
Related Articles
How to Dock in a Slip: Finger Piers, Wind & Current
Learn how to dock in a slip with finger piers—bow-in or stern-in—handling wind, current, and prop walk. Get the step-by-step plan now.
By Breezada Team

San Francisco Bay Sailing: Winds, Tides & Hazards Guide
Plan safer San Francisco Bay sailing with wind patterns, tides, currents, fog and key hazards. Use this guide to pick a route and go sail today.
By Breezada Team
Sailboat Engine Won't Start: Diagnostic Flowchart
Troubleshoot a sailboat engine that won't start with a step-by-step flowchart for batteries, starter, fuel, air, glow plugs & alarms. Fix it now.
By Breezada Team
Sailboat Bottom Paint Guide: Types, Costs & Prep
Learn sailboat bottom paint types, costs, and prep steps—plus how often to repaint. Get the right antifouling plan for your boat today.
By Breezada Team