Florida Keys Sailing Itinerary: 5–10 Days from Miami

Florida Keys Sailing Itinerary: 5–10 Days from Miami
Meta description: Plan a 5–10 day Florida Keys sailing itinerary with nautical miles, anchorages, tides, bridges and costs. Pick your route and sail smarter—start now.
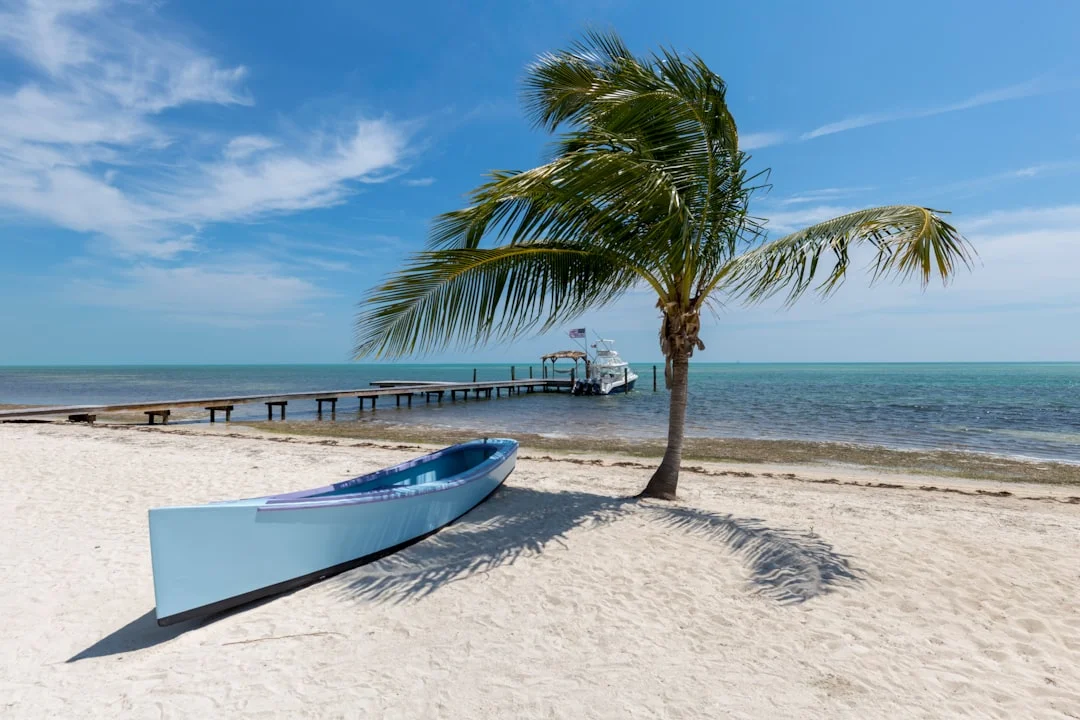
Photo by Keith Luke on Unsplash
Quick Planning Numbers: Miles, Speeds, Daylight, Fuel
Route-planning distances (inside vs outside) you can trust
For Miami-to-Key West planning, think in corridors, not in wishful straight lines. The three practical ones are (1) Biscayne Bay/Card Sound for the Upper Keys exit, (2) Hawk Channel outside the reef line, and (3) Florida Bay/backcountry inside. Each corridor changes both your mileage and your stress level, and those two don’t always move together.
Miami (Government Cut) to Key West is roughly 125–160 nm depending on whether you lean inside (Bayside/Florida Bay) or outside (Hawk Channel). A real multi-stop vacation itinerary typically totals 160–220 nm over 5–10 days, because you’ll detour for protection, snorkel days, and not arriving at an anchorage at sunset with a crew that’s done listening to you.
For the Upper Keys jump, Biscayne Bay to Key Largo via the Stiltsville/No Name Harbor area toward Card Sound/Angelfish Creek usually lands around 25–40 nm, depending on your starting marina and whether you go near Safety Valve/Featherbed Bank. To compare corridor options accurately, calculate the distance between ports using the actual marks/cuts you intend to follow—not the straight line your brain wants.
Time-underway math at real cruising speeds
Most 35–45 foot cruising boats average 5–7 kt over a day once you include reefing, crab-pot slalom, and the last mile of “why is the wind gone.” A 50 nm leg is commonly 7–10 hours from lines-off to hook-down. If you plan your day like it’s a 6-hour sail, you’re setting yourself up to arrive in the tricky part—cuts, reefs, mooring fields—when the light is failing.
Daylight-only entries are the sanity move in the Keys, especially near reef-fringed approaches and unlit backcountry cuts. Build a 1–2 hour arrival buffer for anchoring, a second attempt, or simply waiting for someone to stop dragging across your intended circle. To make sure your ETAs are realistic, check the nautical miles for your planned route before you commit to a “we’ll be there by 1600” promise.
Fuel, reserve margins, and “motorsail reality”
Plan fuel by hours, not miles, because calms and adverse set can dominate. Many auxiliaries burn about 0.6–1.2 gph at 5–7 kt, depending on displacement, prop, and how dirty the bottom is. A 10-hour motor-sail day is typically 6–12 gallons, and you still want reserve for bad timing, not just good intentions.
My minimum reserve mindset for the Keys is “one full extra long day,” which is often 8–10 hours of run time. If your boat carries 30 gallons usable and burns 1.0 gph, your practical range is not 300 miles; it’s how many hours you can keep schedule without turning the itinerary into a jury trial. If you want a quick reality check, estimate your fuel needs based on the voyage distance (then convert to hours with your real-world SOG and add reserve).
A simple leg template keeps you honest: depart window (based on tide/light), ETA (with current), a tide gate if you’re crossing skinny water, an alternate anchorage, and a bailout cut if the forecast slides. Breezada’s sea distance calculator is handy for building those alternates quickly and comparing day hops without re-drawing routes all night.
Practical tip (copy/paste for each leg):
Depart: ____ | NM: ____ | Speed plan: 5–7 kt | ETA (with current): ____
Tide gate (min depth): ____ | Arrive with light: +1–2 hrs | Alternate: ____ | Bailout cut/inlet: ____
Route Choices: Hawk Channel vs Florida Bay vs Hybrid
Outside (Hawk Channel): sea state, reef line, and bailout options
Hawk Channel is the “outside” route most cruisers mean: generally deeper, cleaner navigation, and fewer hard depth surprises. You still need discipline—set and drift can run 0.5–2.0 kt near passes, and the reef line is not a theoretical concept. But you’re usually sailing in water that won’t punish a moment of inattention with a grounding.
The trade is exposure. When a winter front shoves N/NW winds down the line, Hawk Channel can stack up short, square seas, especially when wind opposes current. In summer, squalls can turn a pleasant reach into a wet cockpit in about 12 minutes, so you keep reefs and bailout points preloaded, not “somewhere on the chart.”
Bailouts matter because they change your risk. Identify a few cuts where you can duck into protected water if the sea state builds or a crew member taps out. Expect 0.5–2.0 kt of current in those passes; a fair tide can make you look competent, and a foul tide can make you burn fuel you didn’t plan.
Inside (Florida Bay/backcountry): draft limits, depth reading, and channel discipline
Florida Bay can be flatter and kinder on the crew, but it’s not “easier.” Much of the backcountry runs 3–6 ft outside marked channels, and even a “small” Keys tide of 1–3 ft is a big deal when your draft starts with a 5. A practical comfort threshold for inside routing is about 5.5–6.0 ft of draft; deeper is doable, but your margin becomes a lifestyle choice.
Inside navigation is about staying glued to marks and charted cuts, not cutting corners across pretty turquoise water. ICW markers and good charts matter because the bottom changes fast and the water lies to you when glare and clouds show up. If you find yourself dodging crab pots by steering out of the dredged line, you’re trading nuisance for grounding.
Daylight is non-negotiable inside. Plan to arrive at unlit cuts and shallow turns with 1–2 hours of light remaining, because “we’ll be fine” is not a depth sounder function. Your plotter track from last year may also be wrong after storms shift sand, so keep the eyeballs working.
Hybrid routing: how experienced skippers mix both safely
A hybrid plan is often the adult choice: use Biscayne Bay/Card Sound for the top end, take Hawk Channel when you want depth and simplicity, and duck inside when weather makes outside miserable. The trigger is usually sea state and crew tolerance, not bragging rights. If the forecast says 20+ kt northerly behind a front, I’d rather be bored inside than heroic outside.
Preload alternates on the plotter before you need them: one protected anchorage within 10–15 nm, and one real “hide from this wind direction” option within 25–30 nm. Hybrid routing also helps if bridge clearance or draft limits pinch you; sometimes the best move is simply avoiding a problem span or shallow gate altogether.
Whatever route you pick, reef and coral avoidance is operational, not philosophical. The Keys punish late arrivals: plan entries and anchoring decisions for daylight, and treat that 1–2 hour light buffer as a safety item, not a luxury.
5-Day Classic: Miami → Key Largo → Islamorada → Marathon → Key West
Day 1: Miami to Key Largo (Biscayne/Card Sound approach)
From Miami, you’re typically looking at 25–40 nm to get into the Key Largo area, depending on your starting marina and the route you take around shallow banks. At 5–7 kt, that’s 4–7 hours, plus time for departure traffic, sail setup, and figuring out which boat is “just fishing” in the channel. If you leave after lunch, you’re manufacturing a dusk arrival.
Angelfish Creek/Card Sound is a common gateway, but it’s also a place where poor timing and poor attention can meet. If you’re running thin on daylight, the smart play is to stop earlier in Biscayne—No Name Harbor is a classic bailout—then make the creek in the morning with good light. Your crew will forget the delay; your keel won’t forget the alternative.
Anchorage selection starts immediately: check wind quadrant protection, depth, bottom type, and how crowded it’ll be at 1800. In the Keys, I assume at least one anchorage will have sketchy holding because someone “anchored” on weeds; plan room for a reset and use enough scope for the evening’s wind shift.
Day 2–3: Key Largo to Islamorada and on to Marathon (Hawk Channel rhythm)
Key Largo to Marathon outside via Hawk Channel is commonly planned as 45–60 nm. On paper that’s a day run, but most crews enjoy it more split into two legs with an Islamorada-area stop, keeping daily targets in the 25–40 nm range. That pacing keeps you in daylight, keeps tempers down, and leaves room for weather delays.
Your choke points here are the cuts and the “last mile” approaches. Build your day around arriving early, not arriving fast, because reef-fringed areas and traffic don’t get easier when you’re tired. If you’re late, pick an alternate anchorage before you’re committed; changing your mind at the entrance is how people end up anchored on hard bottom with a bad set.
FKNMS compliance matters in this corridor. Near reef-adjacent areas you may be required to use mooring buoys where provided, and anchoring on coral or seagrass is a good way to damage the place and earn a fine. The rule afloat is simple: anchor on sand patches only, and if you can’t positively identify sand, you’re not ready to drop.
Day 4–5: Marathon to Key West (with optional short hops)
Marathon to Key West outside is typically 40–50 nm, and it often takes 7–10 hours “real time” at 5–7 kt once you include sail handling and the approach. If you want shorter days, break it up with 15–30 nm hops via Bahia Honda or Newfound Harbor, and you’ll arrive with the patience required for a busy Key West waterfront.
Fuel planning is straightforward if you keep it hour-based. If you motor-sail 8 hours at 0.8 gph, budget about 6–7 gallons, then add reserve because you may motor into a headwind or fight a 1–2 kt adverse set in a pass. Don’t let a low tank force you into a night entry.
Key West approaches are not the place for improvisation. Plan to be tied up or anchored with 1–2 hours of daylight remaining, because traffic, currents, and distractions are real. Key West will still be there after sunset; your keel’s dignity might not.
7–10 Day Variations: Starts in Key Largo, Marathon or Key West
If you start in Key Largo: slow down and explore the Upper Keys
Starting in Key Largo turns the trip into a vacation instead of a delivery. You can build 15–30 nm explore-days around weather windows and still make it to Key West with comfort. It also reduces your first-day stress, because Miami departures often come with shipping traffic, bridges, and the ceremonial misunderstanding of right-of-way.
With more days, you can wait out a squall line rather than pretending it’s “just rain.” Bank a short day ahead of any front and you’ll stop making bad choices to protect a calendar. Your total mileage still tends to land around 160–220 nm without detours, but it feels easier because you’re not forcing long legs.
If you start in Marathon: build weather-flex into the Middle Keys
Marathon is the services hub, and it’s well-positioned for Middle Keys exploring or a straight shot to Key West when the forecast behaves. Use Marathon as your “reset” point: fuel, water, pump-out, and a weather check before you commit to longer outside runs. A smart 7-day plan here alternates 45–60 nm transit days with 15–30 nm loaf days so you can absorb a 24-hour delay without losing the trip.
Mooring versus anchoring changes your time budget. Moorings are quick and consistent, while anchoring can steal 30–60 minutes when the bottom is weedy or crowded. That time matters when your plan relies on daylight entry buffers.
If you start in Key West: add Dry Tortugas without rushing
Dry Tortugas is the difference between “Keys trip” and “I actually went somewhere.” From Key West it’s about 68–70 nm one-way, so call it roughly 140 nm round trip before you even poke around locally. In real life, it’s a 2–3 day commitment for most cruising boats at 5–7 kt, because you need weather on both the outbound and return.
The go/no-go is usually the return window. Don’t overcommit if a front timing suggests an ugly beat back, especially with inexperienced crew or an overloaded boat. ISO 12217 categories can help frame your boat’s intent, but the ocean doesn’t care what the builder wrote; it cares about sea state, stability, and fatigue.
Key West slips are expensive enough to influence your plan. At $6–$12/ft/night, a 40 ft boat can easily spend $240–$480/night before power, tax, and fees. If you’d rather spend that money on extra days, plan your Tortugas timing so you’re not trapped paying dockage while you wait.
Anchorages, Moorings, and Legalities (FKNMS + NDZ/MSD)
Choosing anchorages by wind direction and bottom type
Pick anchorages like you pick reef points: for the conditions you’ll get, not the conditions you wish you had. My rubric is protection by wind quadrant, fetch, holding quality, depth and swing room, and your ability to exit if wind reverses at 0200. In the Keys, winter fronts often swing from S/SW pre-frontal to W/NW after passage, so “protected” can flip overnight.
Bottom type matters more here than in many cruising grounds. You’ll see sand, grass, and hard coral rock in the same anchorage, sometimes within one boat length. If you can’t confidently anchor on sand, shorten the day and pick an easier spot; it’s cheaper than a bent rudder and a bruised ego.
Scope is still the language the seabed understands. In 10 ft of water with 4 ft of bow height, you’re at 14 ft of rode geometry; 5:1 is about 70 ft, and 7:1 is about 98 ft. When a front is coming, or you’re in tight quarters, that extra scope and a good set are worth more than the cockpit sundowners.
Mooring fields: rules, reservations, and real costs
Moorings save reefs and save tempers, but they require good habits. Boot Key Harbor in Marathon is the best-known example because it’s protected, service-rich, and popular enough to be its own ecosystem. Managed moorings are commonly around $25–$40/night for a 40–45 ft boat, and the dinghy dock/restrooms are often included or available via a fee.
Pick-up technique matters when it’s blowing 25 and the mooring field is packed. Approach slowly, assign a bow crew who’s not on their first rodeo, and rig chafe gear before you think you need it. If the pendant is short, don’t “make it work” by sawing your bow roller all night; rig a bridle and sleep like a functional adult.
Legal compliance: FKNMS no-anchor zones and Keys no-discharge realities
The Florida Keys National Marine Sanctuary (FKNMS) isn’t just a map overlay; it’s enforced, and it’s there because anchors and chains can destroy coral and seagrass fast. In many reef-adjacent areas you must use mooring buoys where provided, and you should never anchor on coral or seagrass. Even when anchoring is allowed, use sand patches, set carefully, and don’t drag your chain across the grass like a rototiller.
No-discharge zones (NDZ) and MSD compliance are part of voyage planning here, not paperwork. For USCG compliance, secure the Y-valve (lock it or remove the handle), keep the deck pump-out fitting operable, and ensure the vent line stays clear so the tank doesn’t become a science project. Plan pump-outs every few days based on tank size, crew count, and reality—many places are $0–$25 per service, and some offer free pump-outs.
“Free anchoring” also isn’t always free. Budget dinghy dock fees where required, often $5–$20/day, and remember you’ll pay in time as well as money. If your crew expects shore showers and dinner ashore, your itinerary needs to reflect that.
Practical tip (anchoring ethics that keep you out of trouble):
If you can’t visually confirm sand, don’t drop. If moorings exist near reefs, use them. If you do anchor, set hard, confirm you’re not in grass/coral, and re-check after wind shifts.
Tides, Currents, and Shallow Cuts: Timing the Keys
Why a “small” Keys tide is still a big deal
The Keys tide range is commonly about 1–3 ft, which sounds trivial until you’re staring at a flat that’s 3–6 ft deep and your draft is 5.8 ft. That 1.5–2.0 ft swing can be the difference between a clean transit and an unplanned demonstration of keel design. Inside-route planning is basically a tide gate exercise with extra steps.
Datum awareness matters: charted depths reference a chart datum (often MLW), while bridge clearances reference MHW, and your sounder is reading under the keel right now. Add wind setup/setdown and barometric effects, and the “predicted” number becomes an estimate, not a promise. Treat shallow crossings with the same respect you’d give a rocky entrance in Maine.
Current, set and drift: where it surprises sailors most
Expect 0.5–2.0 kt of current in channels and passes, and don’t be surprised when it’s stronger than the app suggested. The surprise isn’t just speed; it’s lateral set that slides you toward shoal edges when you’re busy dodging crab pots or watching another boat do something educational. The fix is simple: steer to maintain track, not heading, and monitor cross-track error like it matters—because it does.
On longer legs near the Straits and around Cape Sable, current can become a real schedule driver. A knot of adverse current over hours steals daylight and forces more motoring, which raises fuel burn and stress. That’s why time buffers are seamanship, not pessimism.
Tide-gate tactics for Florida Bay and backcountry routes
Timing a shallow transit is a repeatable process. Step one: identify the controlling depth and add your draft plus a safety margin—many skippers want 0.5–1.0 ft under-keel minimum when it’s soft mud, more when it’s coral/rock. Step two: use NOAA tide predictions for the nearest relevant station, then adjust for wind setup and your local observations.
Step three: plan to arrive at the gate early, with 1–2 hours of light in reserve, so you can loiter in deeper water if needed. Step four: don’t “hunt” outside the marks—stay disciplined with ICW markers and charted channels, and let the impatient boats create their own stories. If half a 30 nm leg faces a 1 kt adverse current, you can lose about 25–30 minutes plus maneuvering time; that’s often the difference between a relaxed entry and a rushed one.
Bridges and Vertical Clearance: NOAA MHW Clearance Math
Where bridges matter most (inside routes and ICW-style transits)
If bridges are part of your Keys plan, you’re probably leaning inside or doing ICW-style transits. Many major fixed spans in the Keys publish around 65 ft vertical clearance at mean high water (MHW), but “published” is not the same as “guaranteed for your rig today.” If your air draft is near 60 ft, you’re living close enough to care about inches, tide stage, and that antenna you keep forgetting.
Outside routing usually avoids the bridge problem entirely. When clearance is tight, the easiest fix is often route selection, not mast surgery. This is a place where using Breezada’s sea distance calculator to compare an outside alternative can save you a long, stressful inside detour.
Clearance worksheet: air draft vs charted clearance vs tide
NOAA charted bridge clearances are referenced to MHW, not “today’s tide.” If the tide is above MHW, clearance decreases; if it’s below MHW, you gain clearance. Add barometric pressure and wind setup, and you can lose another few inches when you least want to.
Here’s the repeatable math: Effective clearance = charted clearance (at MHW) – tide height above MHW – instrument allowance. Then subtract a safety margin you can live with. A conservative target is 2–3 ft of margin if possible, and more if there’s any sea state, uncertainty, or crosswind-induced heel.
Worked example: 65 ft charted – 1.5 ft tide above MHW – 1.0 ft instruments = 62.5 ft effective before safety margin. If your air draft is 60 ft, you’ve only got 2.5 ft left in perfect conditions, which is not where you want surprise waves.
Practical tips: antennas, instruments, heel, and wave effect
Most “mystery strikes” are self-inflicted by forgetting what’s above the masthead. VHF antennas, wind instruments, Windex, tricolor lights, and radar can add 0.5–1.5 ft depending on the setup. Measure it once at the dock and write it down; guessing is how people buy new electronics.
Also remember heel and wave lift. A gust under a span can heel you just enough to raise the masthead into the bridge geometry, and a passing wake can add a short vertical pop at exactly the wrong moment. In narrow channels, follow the USCG Navigation Rules for narrow-channel behavior, don’t loiter under spans, and don’t create a traffic problem because you’re doing math mid-channel.
Budget + Readiness Checklist (ABYC/USCG-Aligned, Real Costs)
Three budget styles: anchor-out, mixed, marina-heavy
Your Keys budget is mostly about sleep preferences and shore-power habits. Marina-heavy cruising runs $6–$12/ft/night, so a 40 ft boat can spend $240–$480/night before taxes and power, and Key West can be on the upper end. Mixed cruising often uses a couple of paid nights for resets, plus moorings where offered at $25–$40/night.
Anchor-out is cheap on paper—$0/night—but you’ll still pay dinghy dock fees ($5–$20/day), eat more wear on ground tackle, and spend time finding sand. Provisioning in the Middle and Lower Keys can run 10–30% higher than Miami for many staples, so “saving on dockage” can get partially reclaimed at the grocery store.
Fuel is usually not the biggest line item, but it’s the one that ruins plans when ignored. With diesel at roughly $4.00–$6.50/gal and burn around 0.6–1.2 gph, a week of intermittent motoring might be 15–40 gallons depending on wind, current, and how honest your sails are.
Pre-departure systems checks that prevent itinerary-ending failures
The Keys are not the place to discover your seacock handle snapped last season. ABYC H-27 is the mindset: exercise every seacock, verify clamps, and make sure you can actually shut things off underway. In shallow, weedy water, a clogged intake is common, and you’ll want the ability to troubleshoot without flooding your bilge.
For diesel reliability, ABYC H-33 practices pay off: clean filters, carry spares, and know how to change them at sea without turning the cabin into a hazmat scene. Most “we had to cancel” stories start with fuel contamination, cooling flow issues, or an alternator that gave up after a long motor day. Check belts, raw-water strainers, and battery charging before you leave Miami.
Electrical and propane are the two quiet risk multipliers. ABYC E-11 matters when you’re plugging into sketchy shore power—use a proper shore cord, test polarity, and don’t ignore hot plugs. ABYC A-31 matters when your galley is your morale system; test LPG solenoids and sniff the locker, because leaks don’t care how pretty the sunset is.
Key West and Marathon logistics: slips, pump-outs, and shore power
Marathon and Key West are your main resupply and “fix it” centers. Pump-outs can range $0–$25, and NDZ reality means you plan them like fuel stops, not afterthoughts. Configure MSD systems properly: secure the Y-valve, keep the deck fitting usable, and maintain venting so the tank doesn’t pressurize and burp unpleasantly.
Comms and safety are not optional just because land is nearby. Carry VHF with DSC connected to GPS, monitor 16, and follow USCG Navigation Rules in channels and bridge areas. If your itinerary depends on night arrivals, rewrite the itinerary; the reefs and shoals don’t grade on effort.
FAQ
How do I compute bridge clearance in the Keys using NOAA MHW clearance, predicted tide height, and a measured masthead instrument allowance (in feet)?
Use: Effective clearance = Charted clearance (at MHW) – Tide above MHW – Instrument allowance. Then subtract your desired 2–3 ft safety margin and compare what’s left to your air draft. Example: 65 ft – 1.5 ft – 1.0 ft = 62.5 ft effective, before safety margin.
For a 5.8 ft draft monohull, what’s a practical tide-gate method to plan Florida Bay transits when flats are 3–6 ft and tidal range is only ~1–3 ft?
Identify the controlling depth and require at least 0.5–1.0 ft under-keel margin in soft bottoms (more near coral/rock). Time the crossing for predicted higher water, arrive with 1–2 hours of daylight buffer, and stage in deeper water if you’re early. Stay strictly in marked channels; don’t “hunt” outside marks when the sounder starts talking.
What are the typical set-and-drift scenarios (0.5–2.0 kt) in Keys passes, and how should I adjust ETA/fuel if half a 50 nm leg is against 1.5 kt adverse current?
Expect 0.5–2.0 kt in passes and cuts, with lateral set strongest near constrictions. If half of a 50 nm leg is into 1.5 kt adverse current, your speed over ground can drop from 6.0 to about 4.5 kt on that half. That typically adds roughly 40–60 minutes overall once you include maneuvering, so budget extra fuel by hours (often +1 hour of burn).
In Boot Key Harbor’s managed mooring field, what pickup, pendant, and dinghy-dock practices reduce chafe and conflicts during winter-front reversals?
Approach slowly, rig a bridle, and add chafe protection where the pendant meets your cleats or bow chocks. Expect wind reversals with fronts, so leave enough slack for yaw without letting hardware saw all night. Use assigned dinghy dock areas, keep painter lengths controlled, and don’t block fuel docks or ramps during peak 1600–1900 return traffic.
How should an MSD/holding-tank system be configured for Keys no-discharge zones (Y-valve securing, venting, pump-out planning) to stay compliant during a 7–10 day cruise?
Secure the Y-valve to prevent overboard discharge (lock it or remove the handle), verify the deck pump-out fitting works, and keep the vent line clear so the tank can breathe. Plan pump-outs every few days based on tank capacity and crew count, using $0–$25 as a planning range. Treat pump-outs like fuel stops: scheduled, not aspirational.
Conclusion: Route-first planning that keeps the trip fun
Start by choosing your corridor: outside via Hawk Channel, inside via Florida Bay, or a hybrid that matches draft, sea state tolerance, and bridge air draft. Keep the core numbers in your head—125–160 nm Miami to Key West depending on routing, 5–7 kt real-world averages, and currents/tides that can add an hour or erase your clearance margin. Build each day around daylight entries, FKNMS anchoring compliance, and a budget style (anchor-out, mooring, or marina-heavy) that your crew will still like on day five.
Before you cast off, do a simple go/no-go: enough fuel reserve for an extra 8–10 hours, a legal MSD setup for NDZ waters, and a plan that arrives with 1–2 hours of light. Then use Breezada’s sea distance calculator to sanity-check each leg and your alternates, because the Keys reward skippers who plan like they’ve made mistakes before.
About the Author
Related Articles

Starlink on a Sailboat: Setup, Power & Mounting
Learn Starlink on a sailboat setup, power needs, and mounting tips. Get connected offshore—read the guide and start your install today.
By Breezada Team

Sailing the Canary Islands: Inter-Island Routes & Tips
The Canary Islands offer year-round Atlantic sailing across seven volcanic islands. This guide covers inter-island routes, distances, wind conditions, marinas, anchorages, and a practical two-week itinerary.
By Breezada Team

Seasickness Remedies for Sailing: What Works, Timing
Learn evidence-based seasickness remedies for sailing—meds, patches, bands, food, and habits—with dosing/timing and watchstander safety tips. Plan your kit now.
By Breezada Team

Spring Commissioning Boat Checklist: Get Ready to Sail
Spring commissioning takes 15-25 hours and covers hull, engine, plumbing, rigging, electronics, and safety gear. This practical boat checklist walks through each system in the order that matters in a yard, with realistic time and cost estimates for a 32-40 foot sailboat.
By Breezada Team